
Whether it’s Pardot’s nominal transition to Marketing Cloud Account Engagement, a “platform migration” for your marketing team, or a “new job, new tech-stack” situation — it seems more and more Marketers and Salesforce (and/or Pardot) Admins are picking up Marketing Cloud.
As a user of both, but certified in Pardot before my introduction to MC, I figured I could lend a hand providing the “translations” I wish I had during my learning curve.
I’d know exactly what I want to do in Pardot, but have the hardest time making sense of where similar functionality would live in Marketing Cloud. Segmentation Lists, Data Extensions, Engagement Programs, Journeys, Prospects, Contacts — there’s almost a shared language, but sometimes the “grammar” is so different they’re incomprehensible.
So this series is that. “Here’s what I want to do in Pardot — Here’s how I do it in Marketing Cloud”. Today, it’s automating a segmentation list / creating a Dynamic List in Marketing Cloud.
Automating a Segmentation List
What we want is to automate the production and maintenance of a list of Prospects we can use as the audience of an Email or an Engagement Studio Program. It should be able to look at all of our Prospects, filter them by the desired/selected criteria, and add or remove them accordingly.
Pardot
Pardot “speakers” will recognize this functionality as a Dynamic List (or an Automation Rule in certain circumstances).
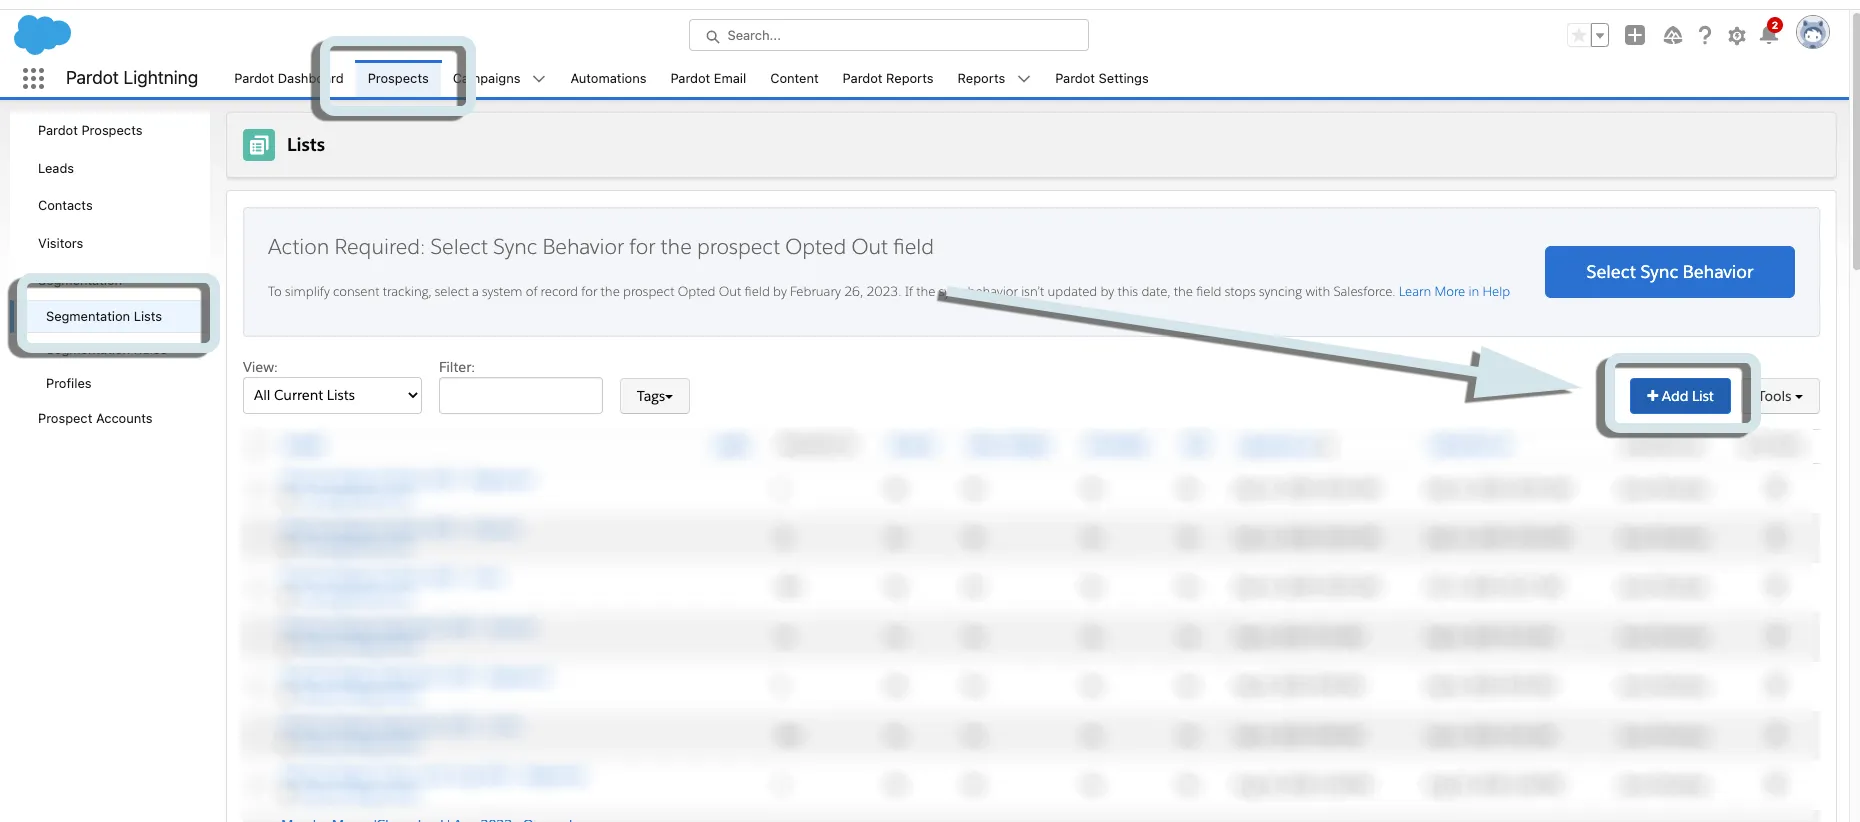
Create the Dynamic List (in Prospects -> Segmentation Lists -> “+ Add List”)
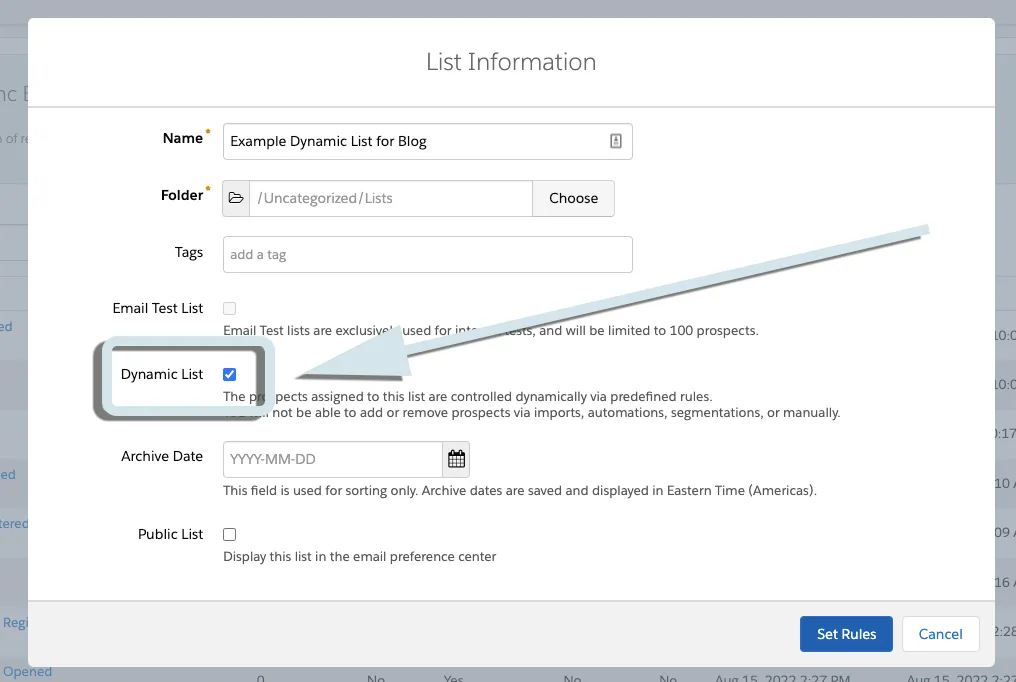
Check the “Dynamic List” Checkbox.
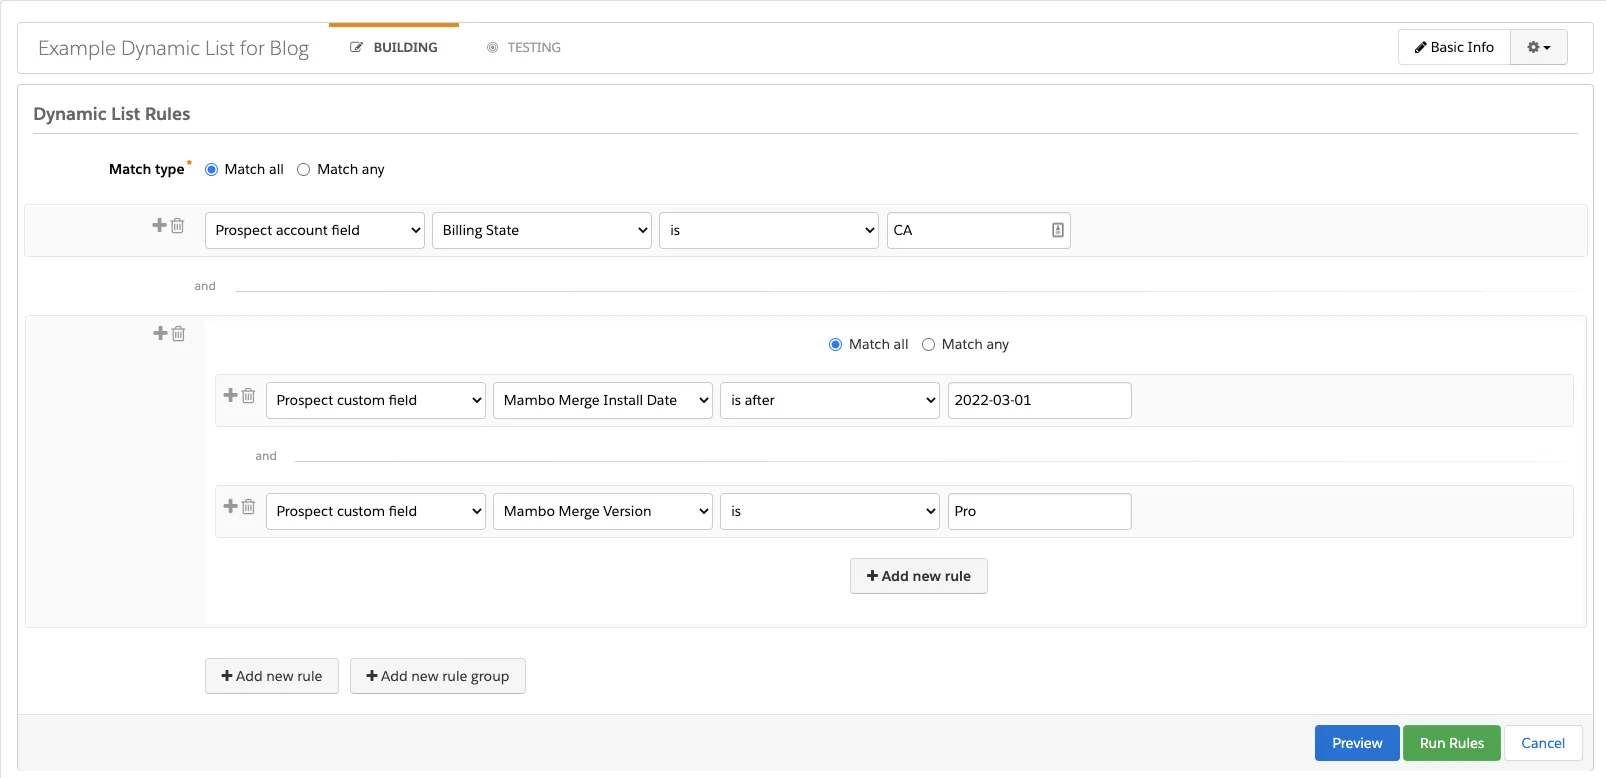
Set Your Rules and Run.
And now you can invoke your list in List Email or Engagement Program — easy!
In Marketing Cloud
In Marketing Cloud, we’re going to filter one of our Data Sources or Data Extensions, and save those Contacts to a new Data Extension — which we’ll then be able to target in our Email Send or Journey.
So first, we need to decide which pieces of our Marketing Cloud data we’d like to filter. If you already have your Audience broken out into lists and sub-lists, pick the one you’d like to filter, and jump ahead (scroll until you see “find the tiny tiny filter button””).
But, if you’re new to Marketing Cloud, you likely just finished getting your Salesforce sync set up (and it is!) and you’re wondering why you’re not seeing anybody in your Subscriber List or All Contacts.
That’s a post for another day, but let’s get you some Prospects er, sorry, Contacts.
Head to Email Studio
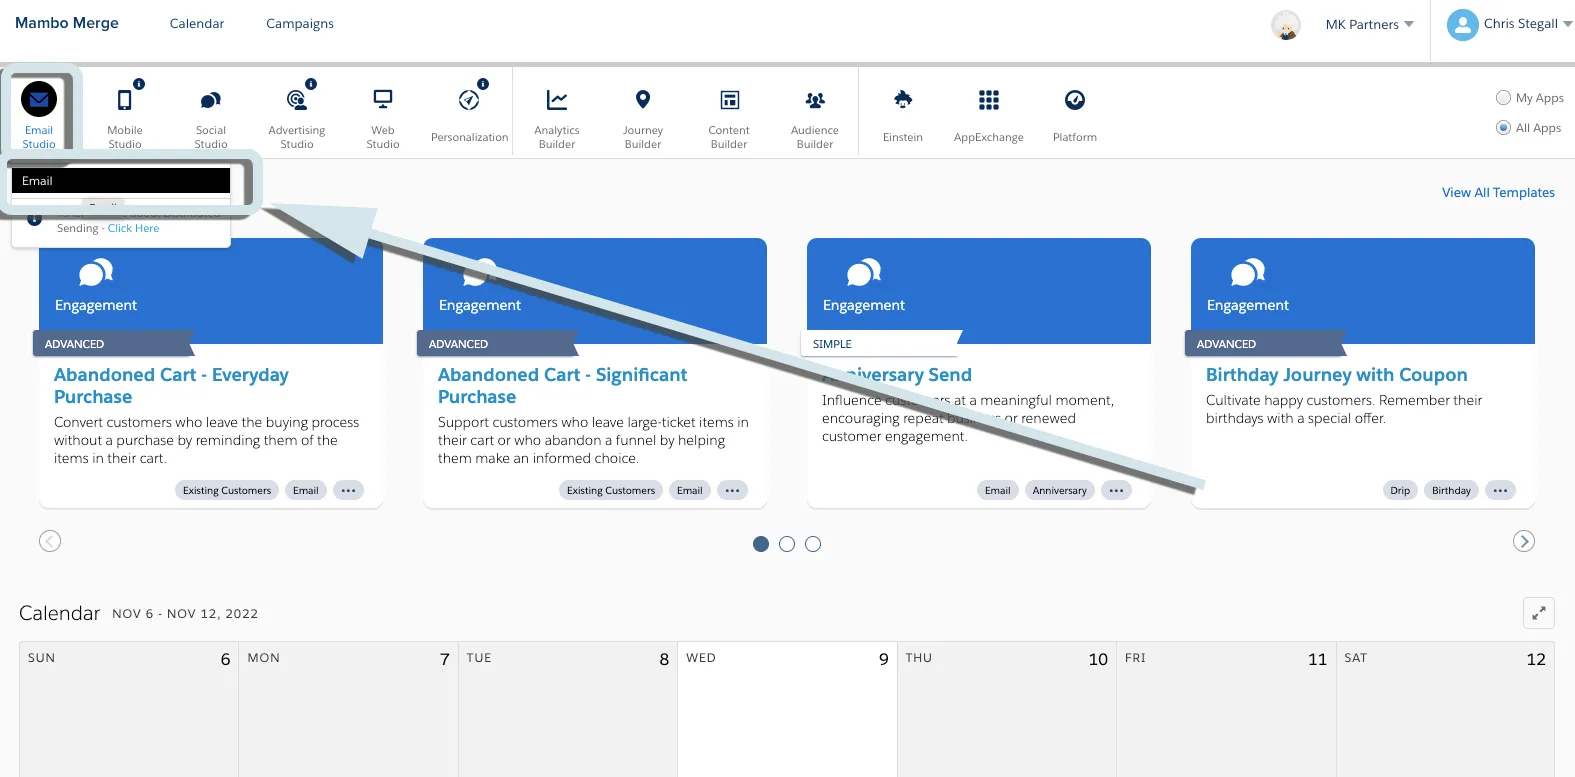
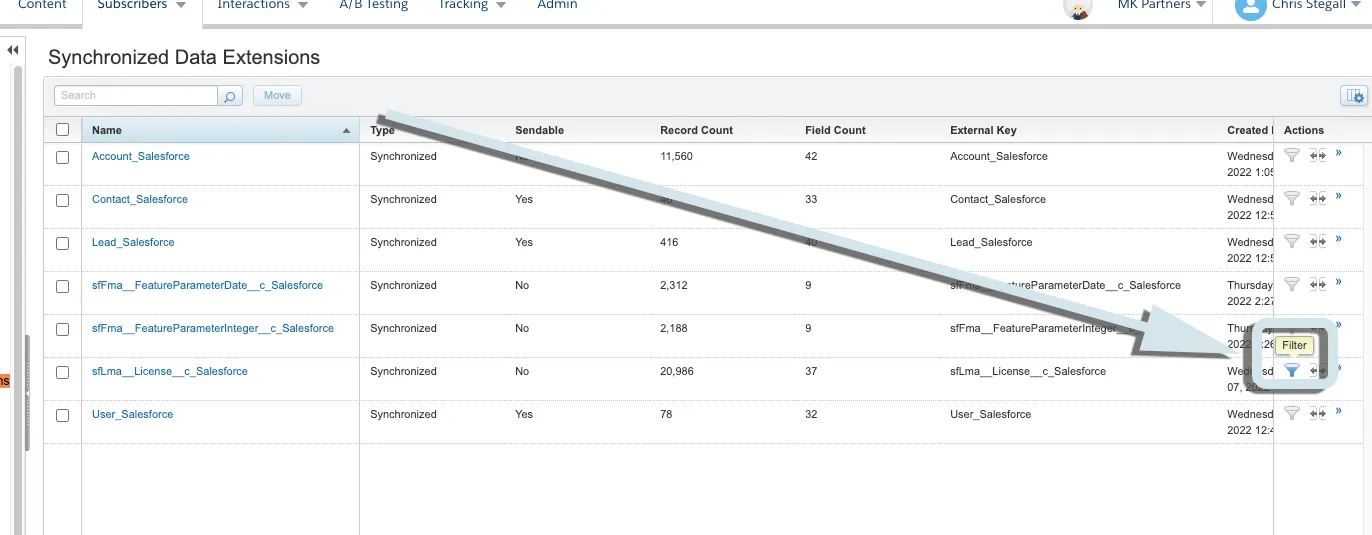
Select Your Synced Data Sources (here called Synced Data Extensions for some reason). This’ll be the Salesforce object you’d like to run your criteria against for your list, so likely Leads or Contacts.

And find the tiny tiny “filter” button on the right hand side.
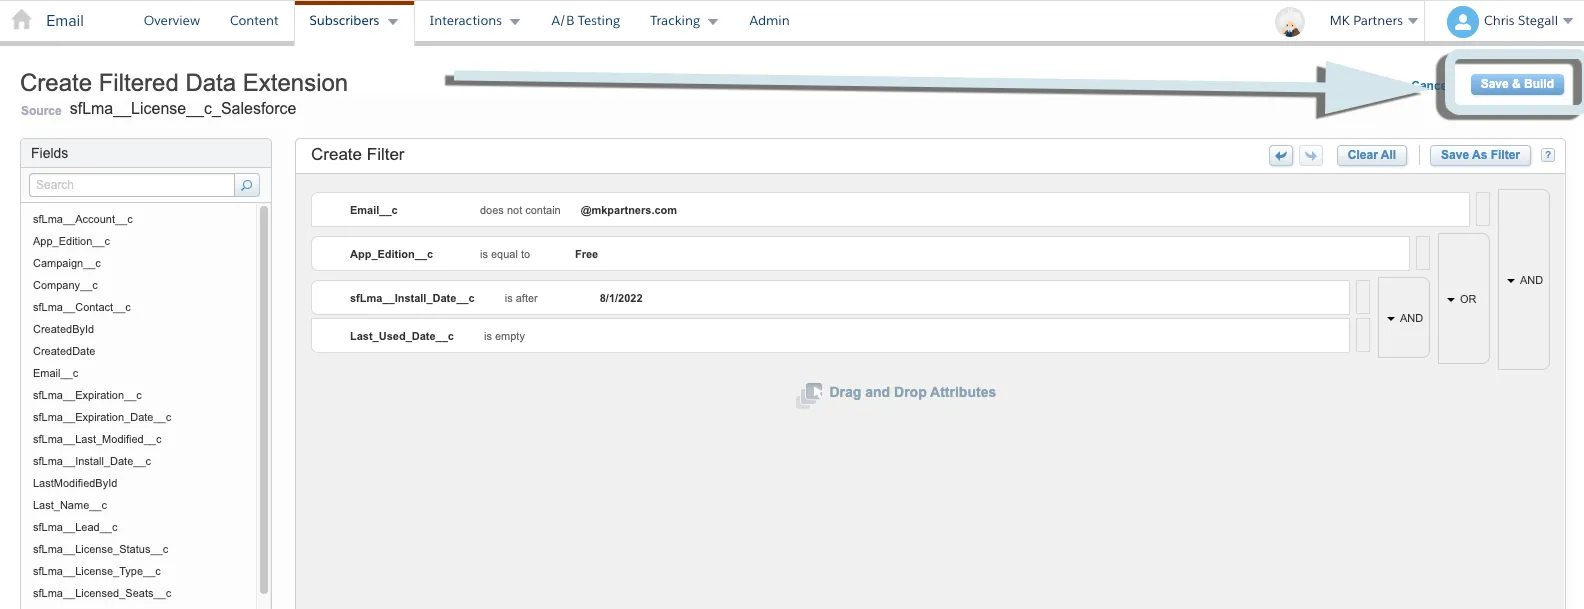
Now this looks a bit more familiar. Set your filter criteria like you would set them in your Dynamic List and click “Save &Build”.
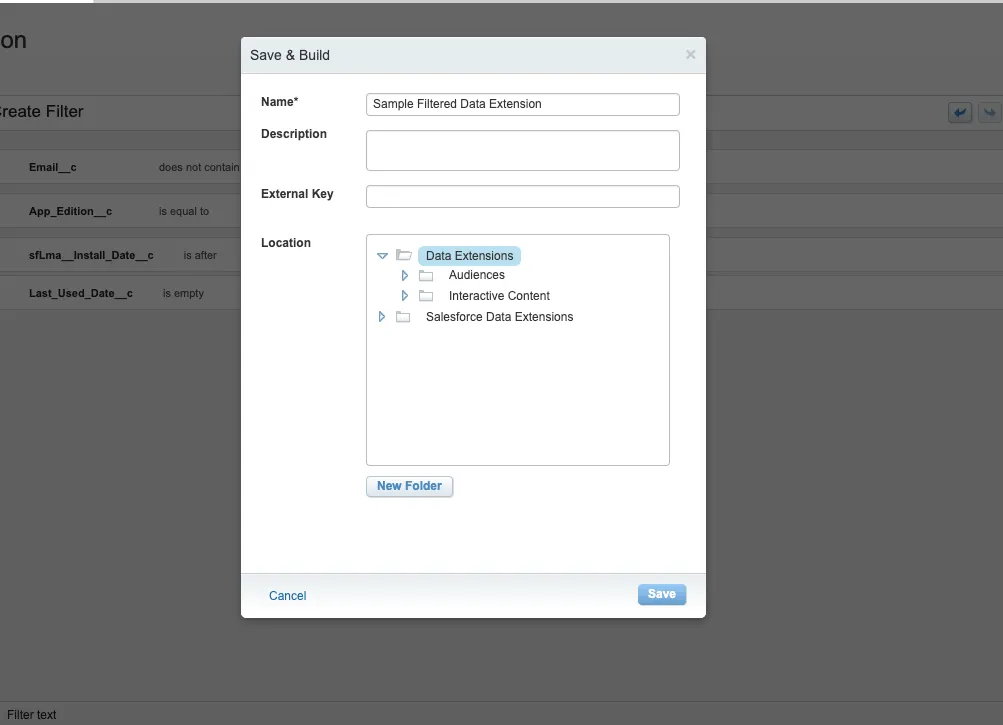
Give your new Data Extension a name you’ll recognize, put it in the appropriate folder, etc…
And now you have a Data Extension you can use in Your Email or Journey! And, just like a Dynamic List, when they enter the list, by meeting the criteria, they can be sent straight into the appropriate journey!
Congratulations! You just created a Dynamic List in Marketing Cloud!
Hope that helped. As always, if you have additional Marketing Cloud/Pardot questions, need a hand getting more out of your org’s Salesforce, or want to build an AppExchange app — drop us a line! We’re always happy to help.
And, if you have “translations” you’d like to see from Pardot to Marketing Cloud — drop ’em in the comments. Until next time, keep working hard, smart, and happy. We’ll see you in the cloud.