
“Pardot” was my introduction to the marketing aspect of the Salesforce ecosystem, hence I will always remember it that way. My trailblazer career began by compiling emails with custom redirects, building out forms and mapping them to landing pages. Followed by reviewing engagement metrics and analyzing prospect behaviors. With all the changes in the “Pardot” horizon, some of which are taking place as we speak, it’s no surprise that the latest naming convention is something everyone will need to adapt as Marketing Cloud Account Management (MCAM) will eventually be the name everyone will be using and the “Pardot” name will go down in the history books.
New or existing Pardot Users will begin to further expand their knowledgebase and skills by utilizing more and more of the tools Marketing Cloud (MC) has to offer. As I am currently transitioning, I’ve come to realize there is a learning curve in place. But don’t worry, it’s not as bad as one would think. Let me share some helpful tips I picked up along the way.
Because there are many tools within MC, we’ll begin by outlining the steps necessary to build a Landing Page (LP) followed by adding a form to it. Followed by outlining the differences and sharing some helpful tips. With that said, let’s get started. Before we do, we must quickly address how data is collected between “Pardot” and MC.
Inside “Pardot” forms are created by defining unique attributes like name, tags, domain, etc. Followed by defining the prospect default or custom fields with a type and data format.

“Pardot” lists are used to segment prospects based on criteria and narrow prospect groups to generate targeted emails. MC uses both lists in a similar method but also introduces Data Extensions where data is now stored in a table and can have practically as many fields as you can imagine. (There may be limitations but its not something that MC addresses on its help files).
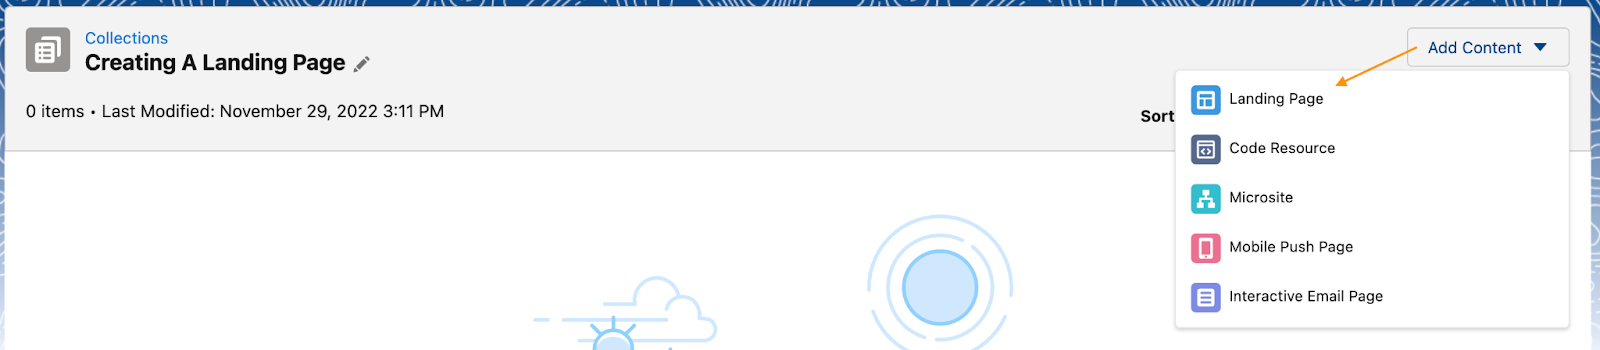
Within MC simply head over to Cloud Pages within Web Studio and create a collection.

Inside a collection select the drop-down menu to add content. Because we are building a landing page will select the “landing page” content.
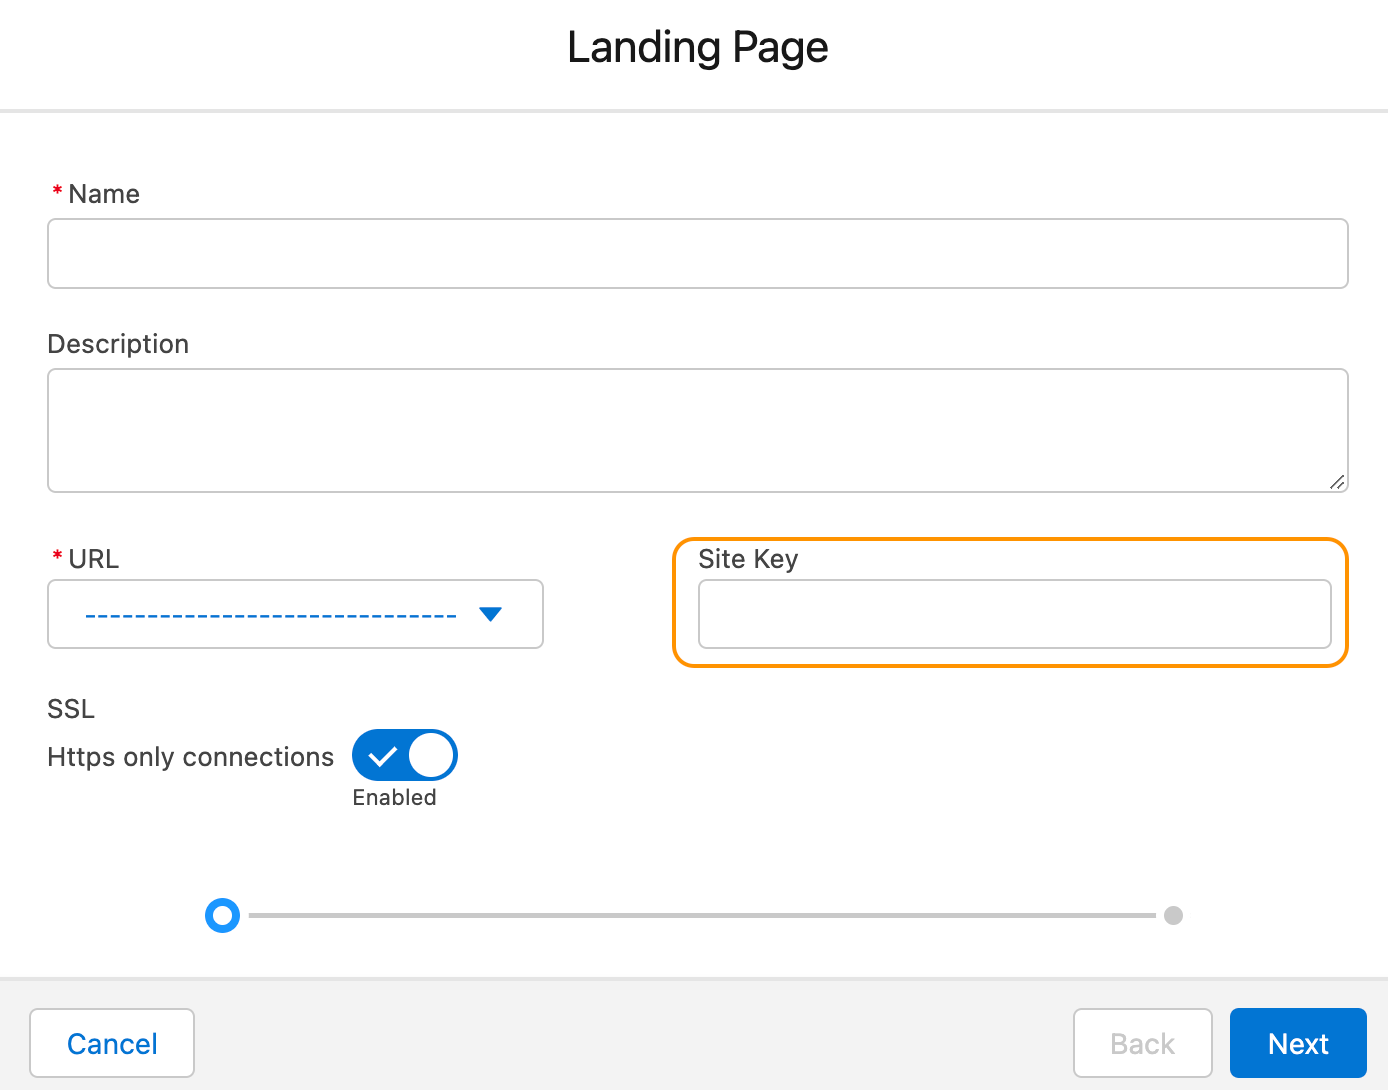
Give your LP content a name and description. Also, make sure to define the domain this page will use as well as a “site key”. With my previous Pardot experience, I was able to quickly identify the site key refers to the vanity url which provides a simpler more descriptive url.
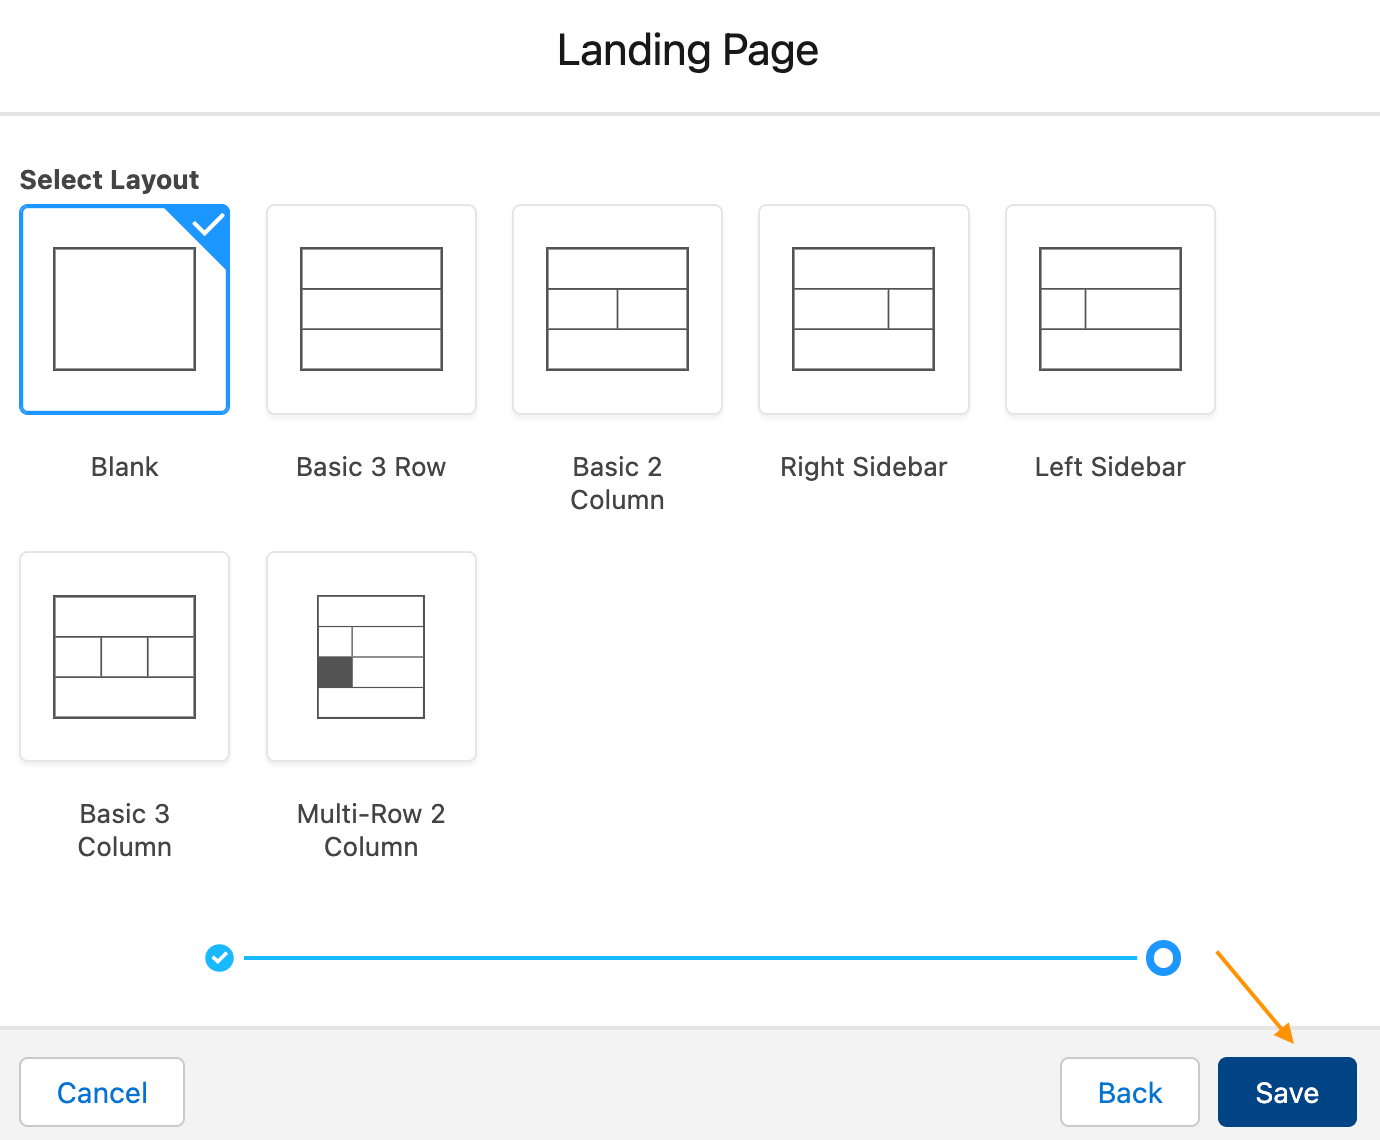
Next, choose an LP preset layout or blank if you want to start from scratch. For our example, we chose the Basic 2 Column layout. Don’t forget to save in order to complete the process and build out the page characteristics.
Once saved you will be taken to the dashboard to add content blocks, adjust layouts and modify the design.
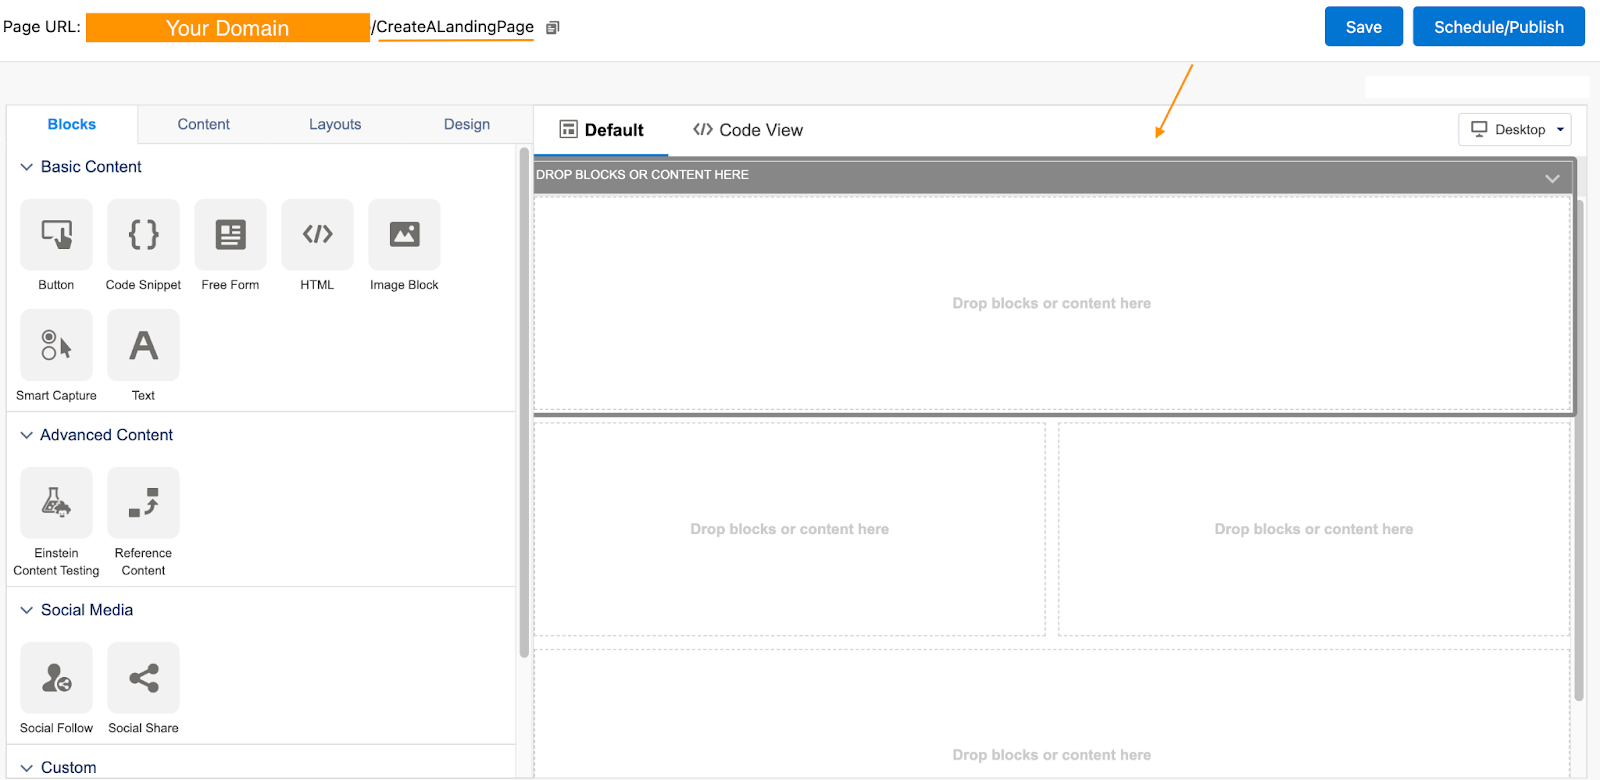
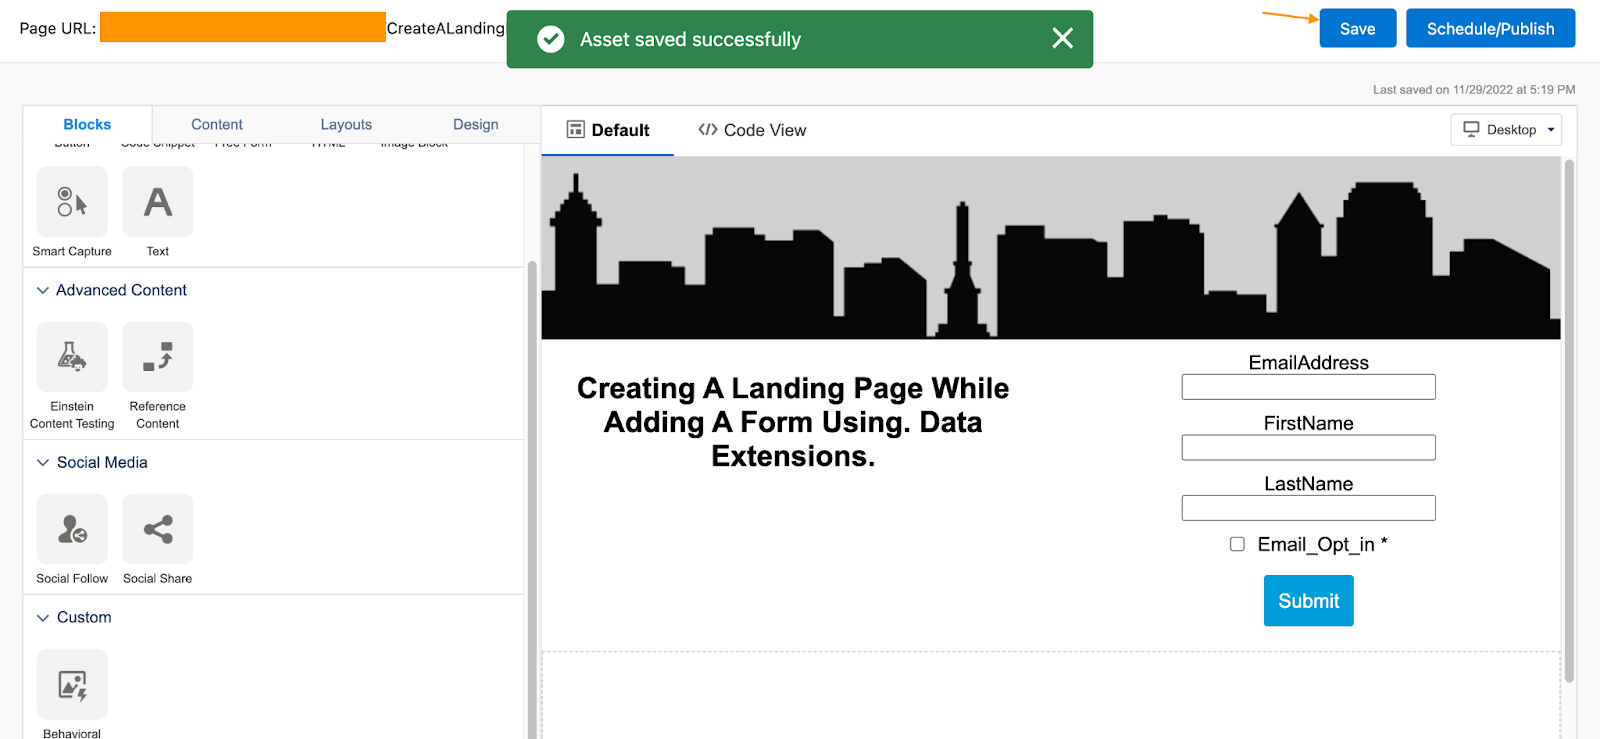
For our example will add an image placeholder to the header block, some text to the left middle block and a form on the right block. Will leave the bottom block empty. Using the content block from the left navigation will easily drag and drop them accordingly.
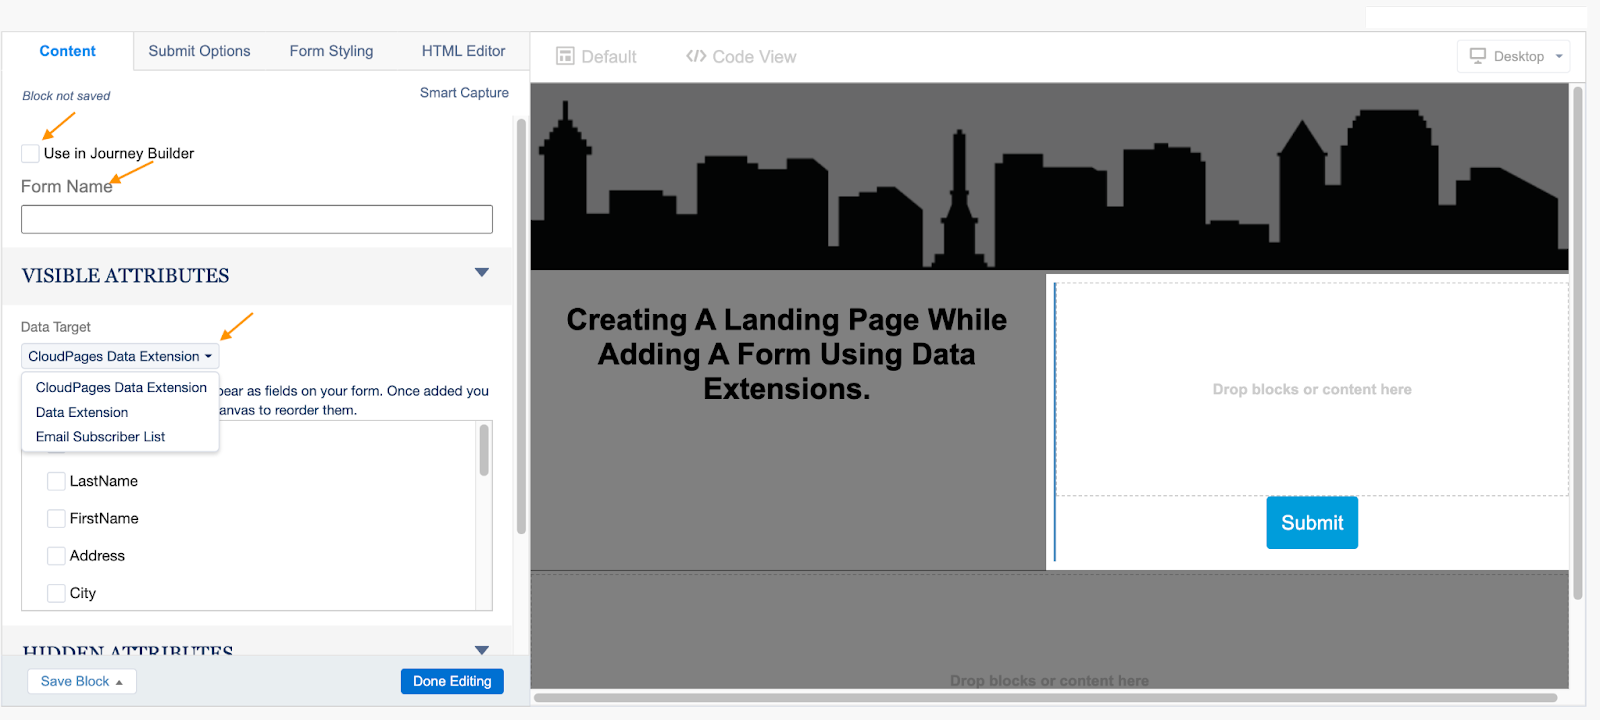
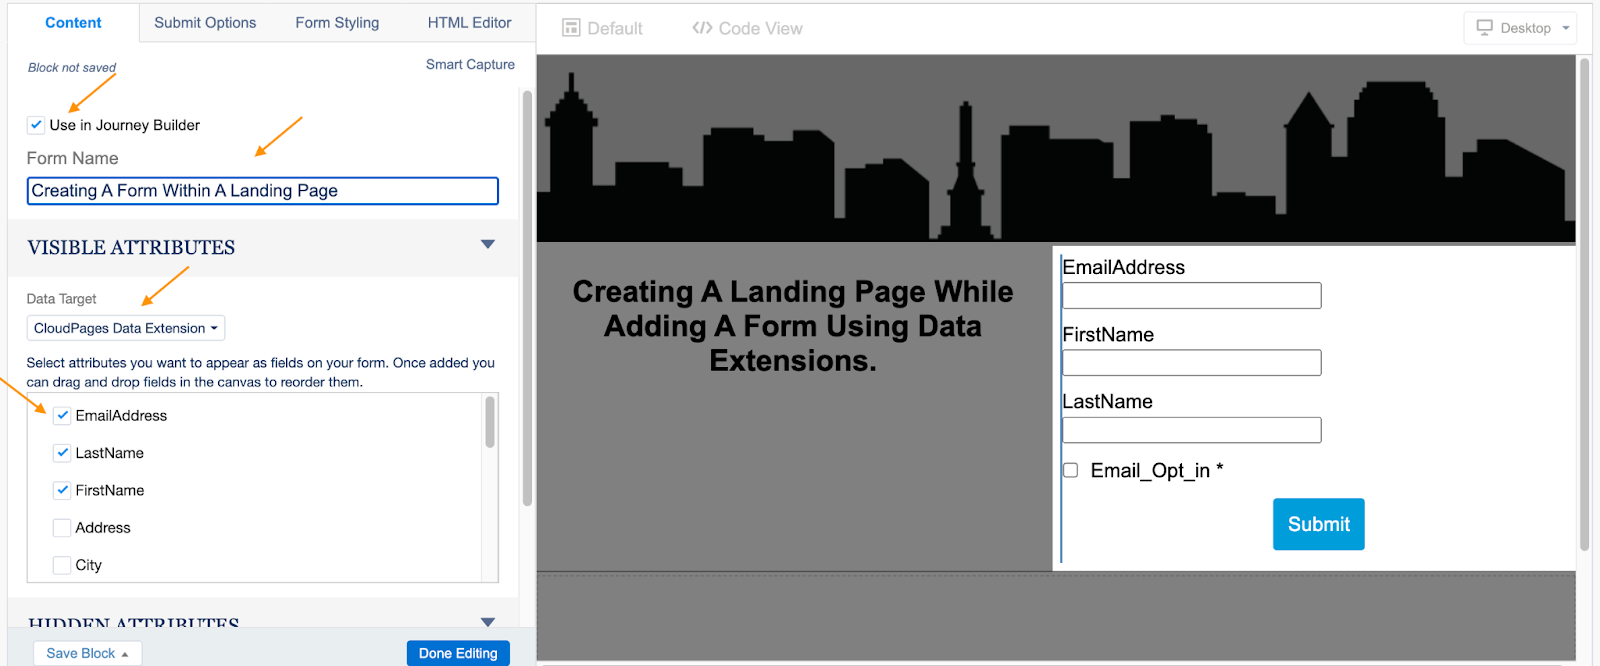
Use the “Smart Capture” content block to add a form to your LP. Once dragged within a supported block a series of settings must be configured for the form to accept submissions once published. First off, give your form a name and if you plan to use it within Journey Builder check off the box. I’d recommend you automatically do this since it can always be changed after the form is published. Now comes the visible attributes that provide the fields you wish to use to collect the information you seek each time a submission is made.
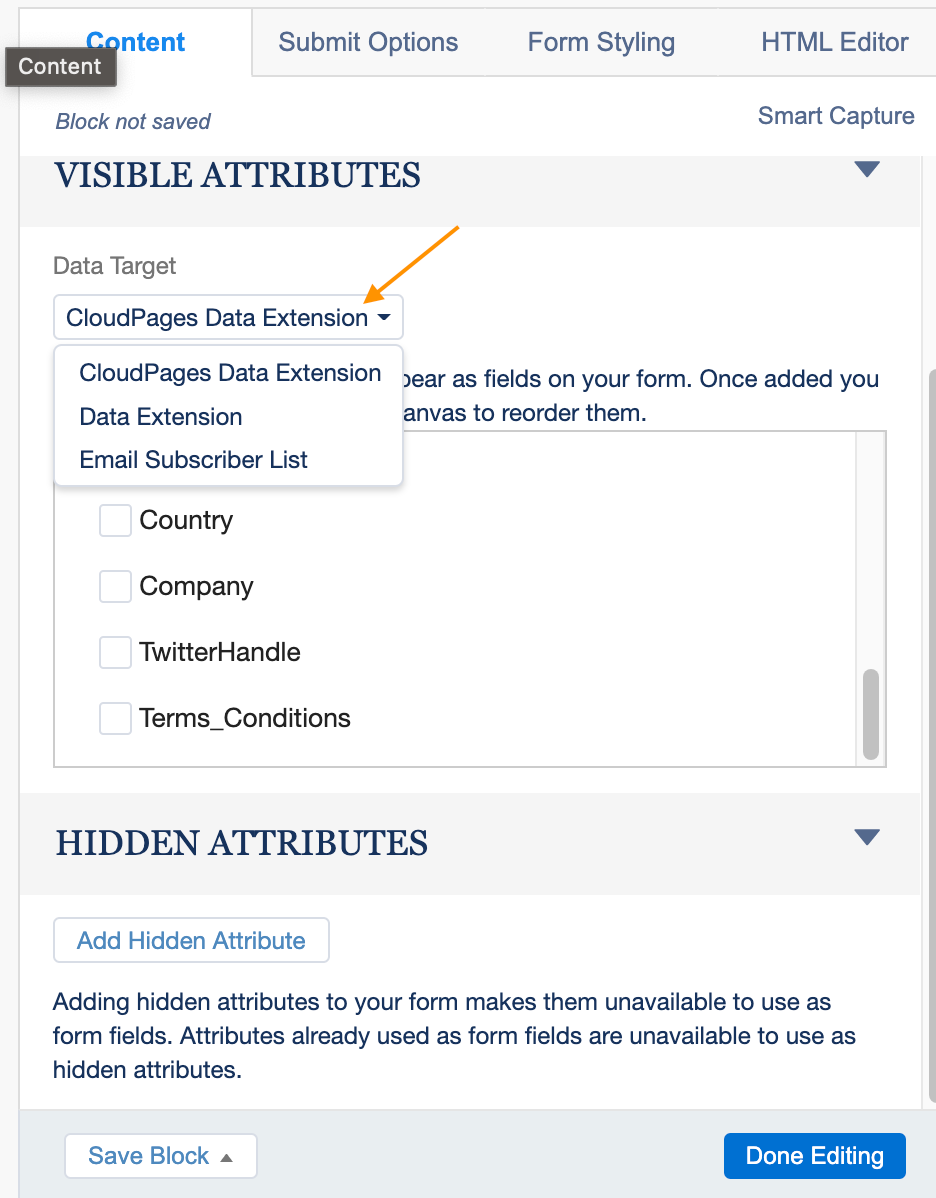
Within MC you have 3 methods to define the attributes which will be used to create a form. A CloudPage Data Extension, A Data Extension (DT) or a Subscriber List. Our example will be using a CloudPage DT since the fields we need to collect data from are standard.
Note: This Helpful article identifies best use-case scenarios for using Lists versus Data Extensions.
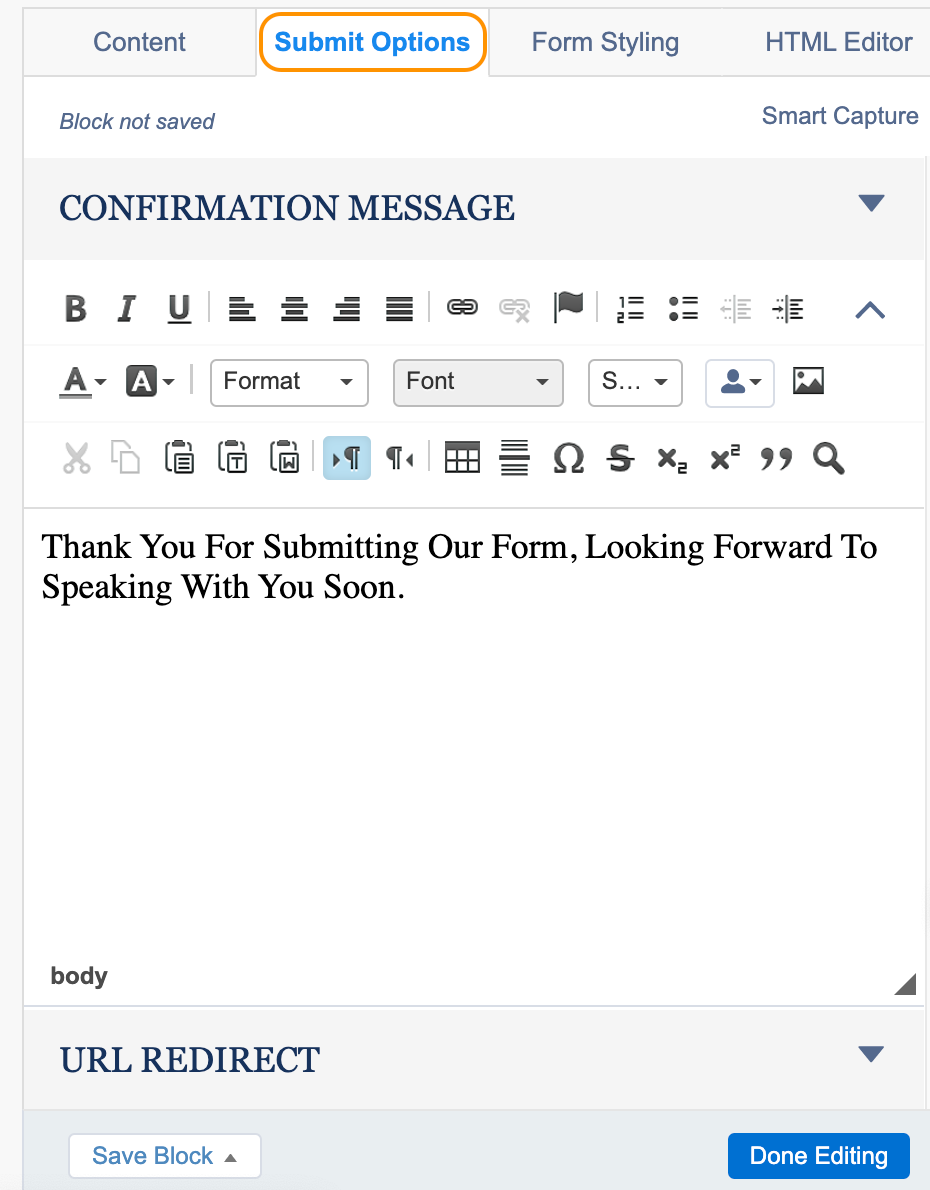
Now simply use the “Submit Options” tab to provide the confirmation message once the form’s submit button has been pressed. You can also customize the button font, size and color from this tab.
If you’d like to give some flare and style to the form, go ahead and use the “Form Styling” tab to change background colors and more.
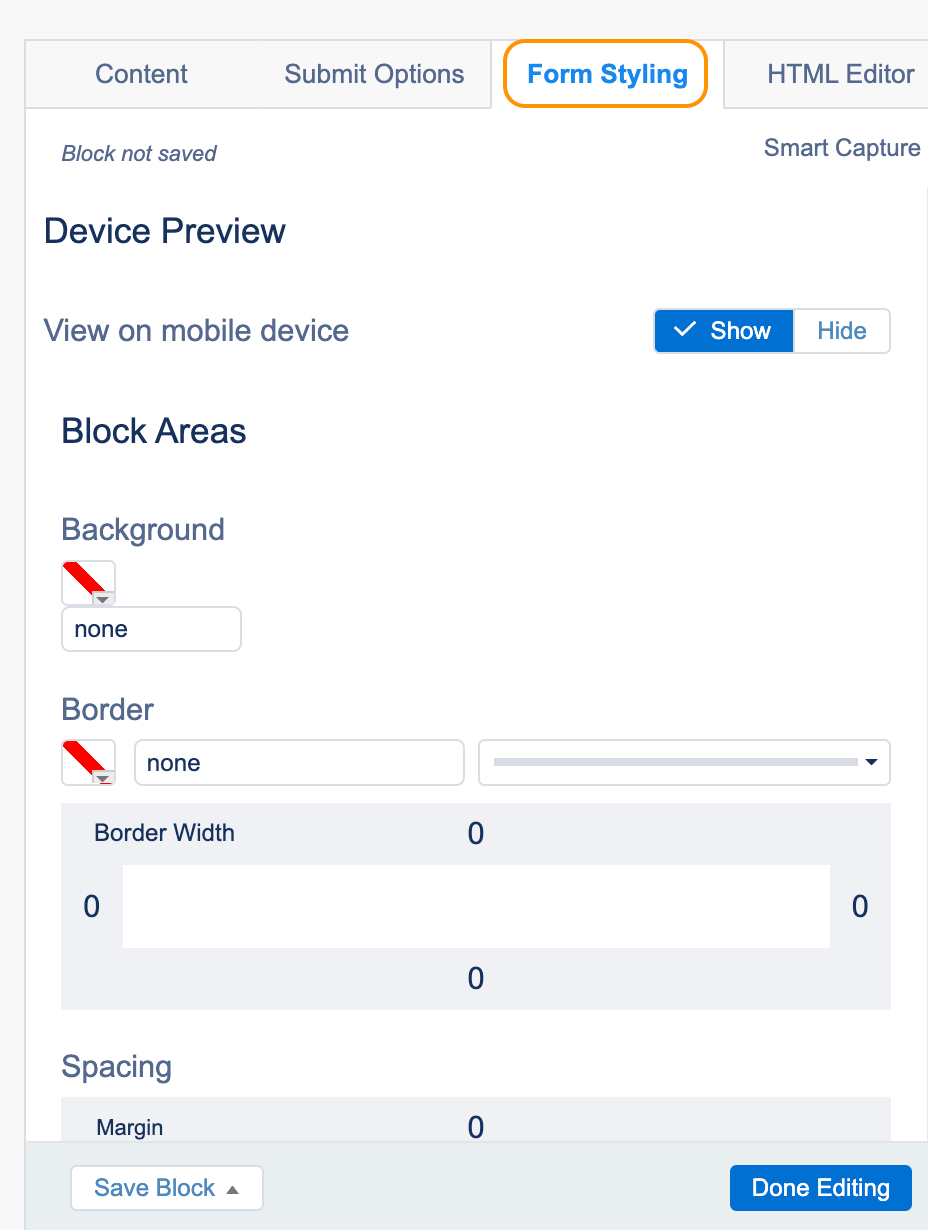
Don’t forget to save periodically in order to ensure all changes are stored and up to date.
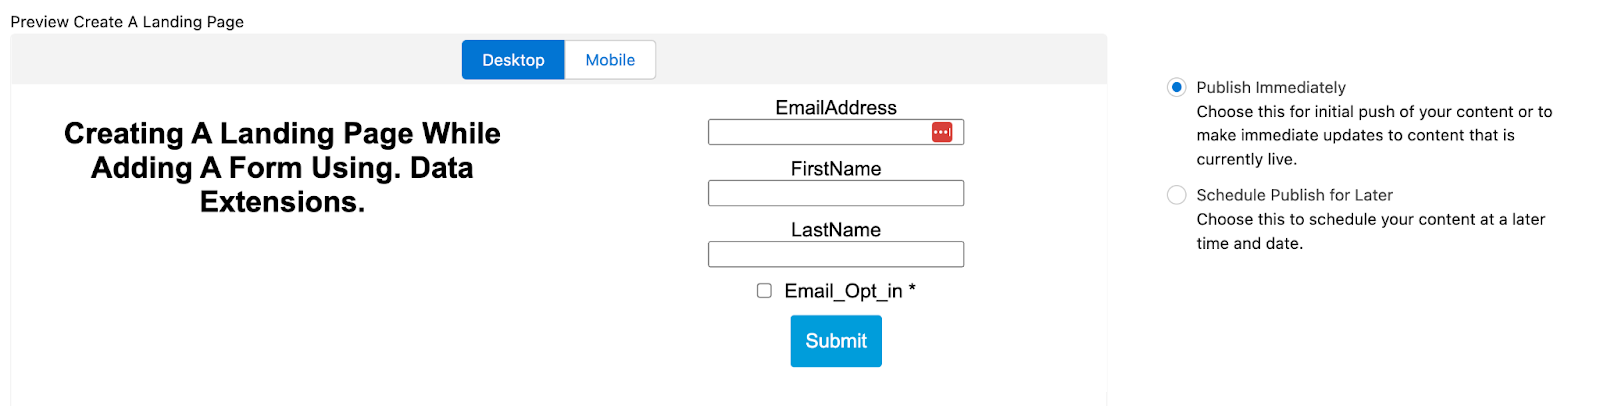
Now that we have our form added we can go ahead and publish this LP. You will get a preview before you confirm and the option to publish now or later. Press the “Publish” button to make the LP go live.
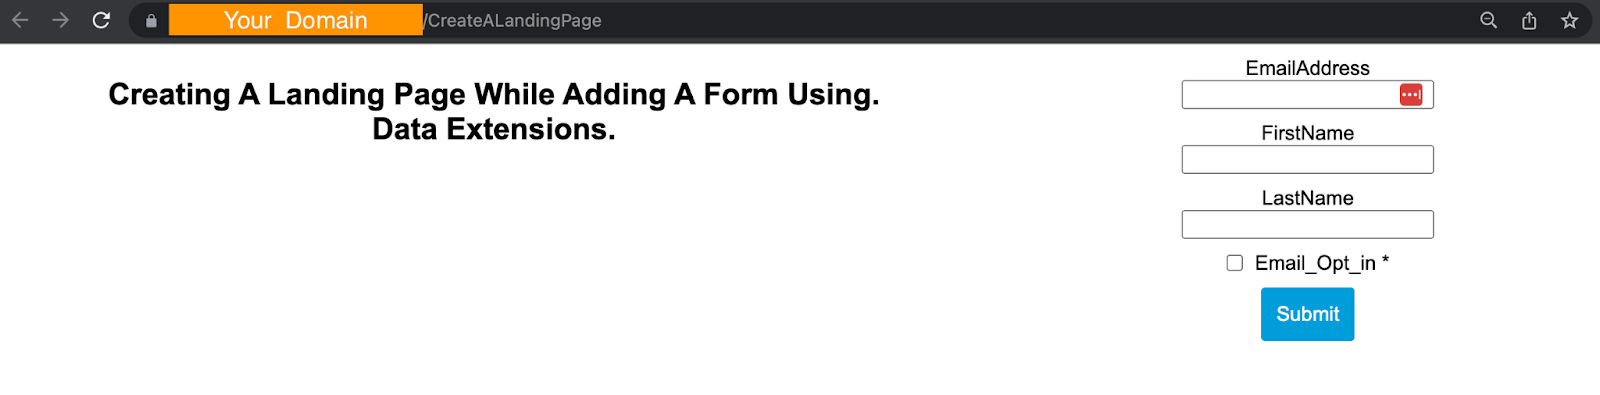
Once published you can go ahead and test your form to adjust as needed by going back into MC.
Now taking a step back we can see that building a form within MC requires a few more steps than doing it within Pardot. Knowing what field(s) data you wish to collect helps identify what type of data target to use. Referencing the helpful article provided previously we know that DTs help support multiple data sets and separate definitions as well as better for importing and sending based on triggers. We hope this has helped you better understand the steps needed to get your first form up and running on MC.
Of course, if you need some extra help, have other Salesforce, Pardot, or Marketing Cloud requirements, or have a vision for your broader Salesforce org but need some insight to help build it out — drop us a line! We’re always here to help.
Thanks for sticking around and we’ll see you in the cloud.