
How to Merge Accounts
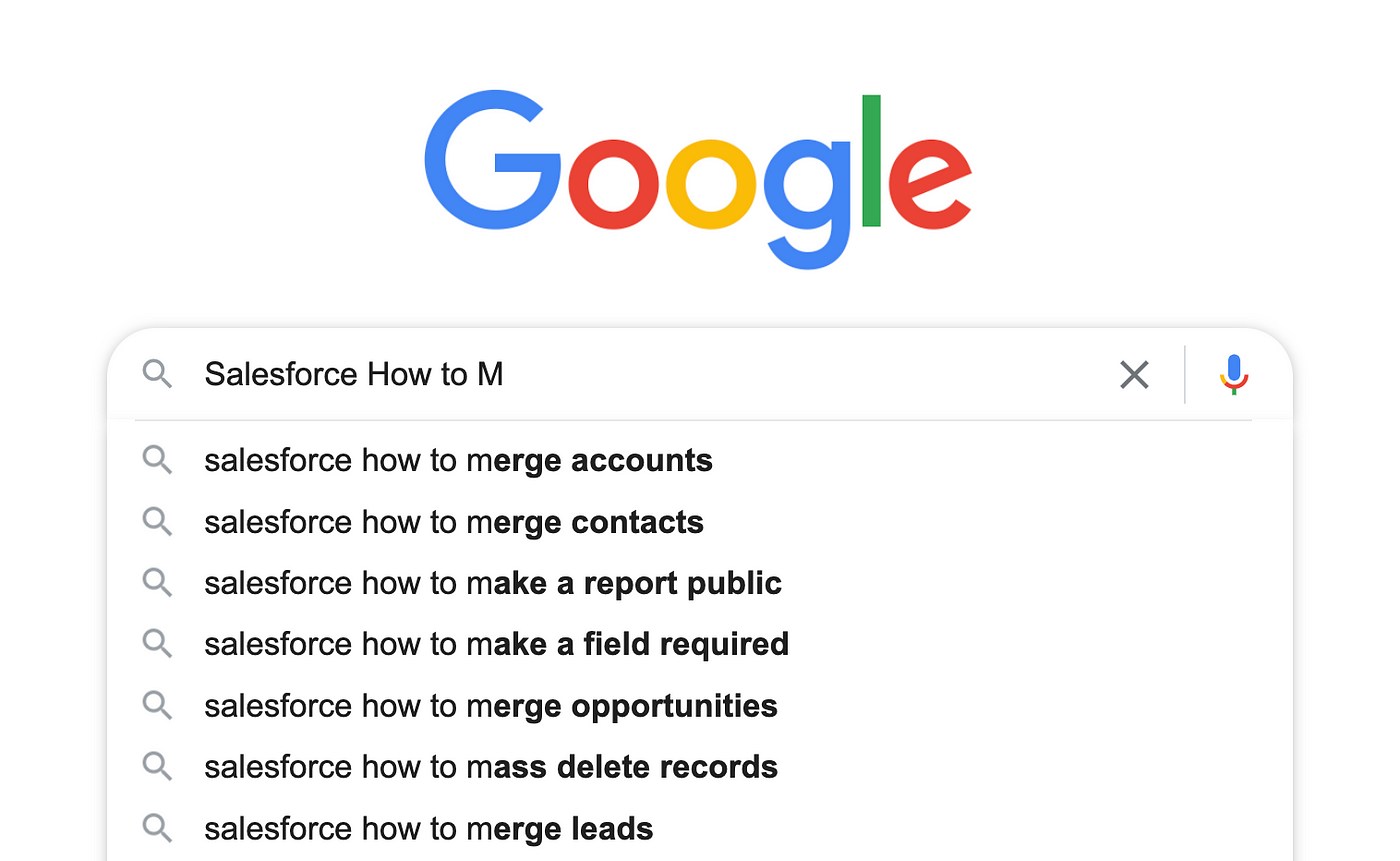
As we set off into November, Salesforce Days has added its sessions for the month. That means that lots of trailblazers will begin an immersive experience designed to empower all types of learners and support partners and those new to the Ecosystem. Helping them grow and build a better understanding of the Salesforce platform. With so much new information up in the air, many will find themselves googling things they “sewar they used to know… but it’s been a while”. And that makes this the perfect time for another installment of our Salesforce “How to” ABCs! The series where we tackle the most commonly Googled Salesforce questions, letter by letter, to help trailblazers find the answers they’re looking for fast!
Today’s letter is “M” as in, “How to Merge Accounts”. Let’s dive in!
When managing accounts it’s important to merge duplicate records to unify data into one single source. Within Salesforce there are tools to help simplify the process. Let us walk you through some of these steps to get you started.
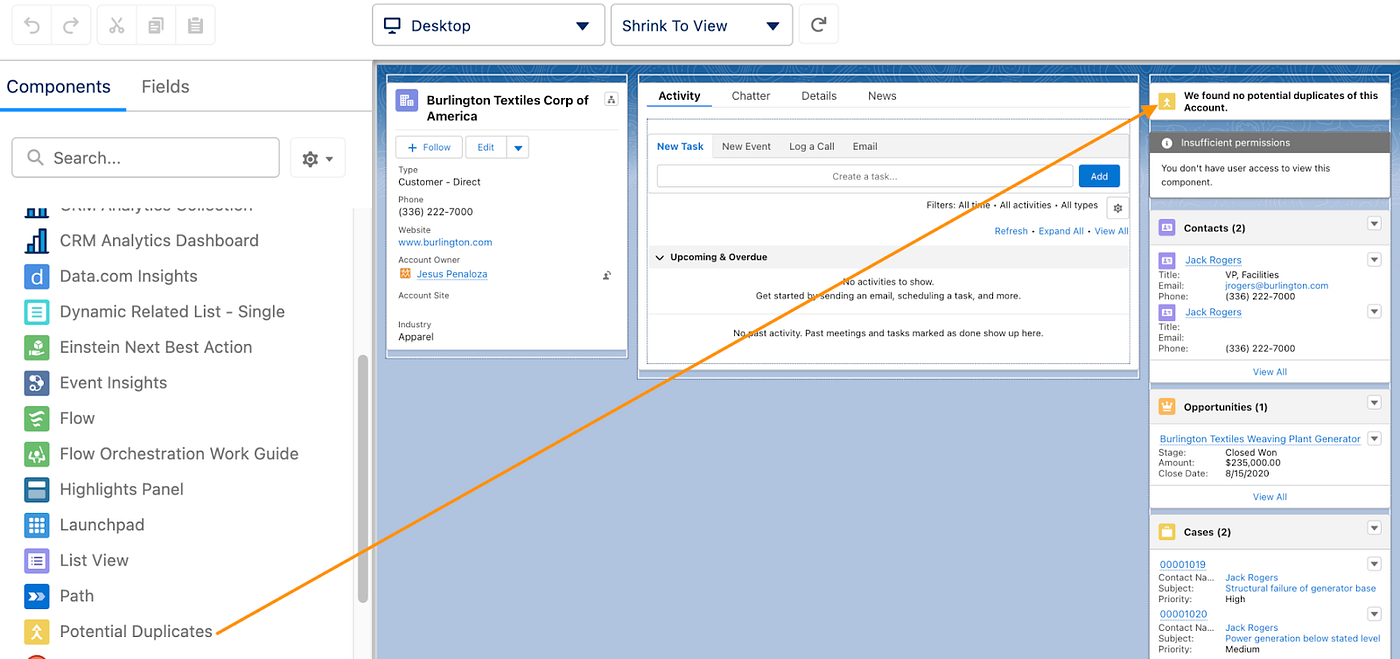
**Lightning Mode Instructions **Before we dive into the steps we need to make sure the following tools are in place. First, we need to ensure the “Potential Duplicates” component is added to a page layout. The Sales Cloud Accounts object should have it installed but if it doesn’t, simply head over to the “Setup” gear and select “Edit Page”. Just drag and drop the “Potential Duplicates” component into the Accounts Page Layout and “Save”.
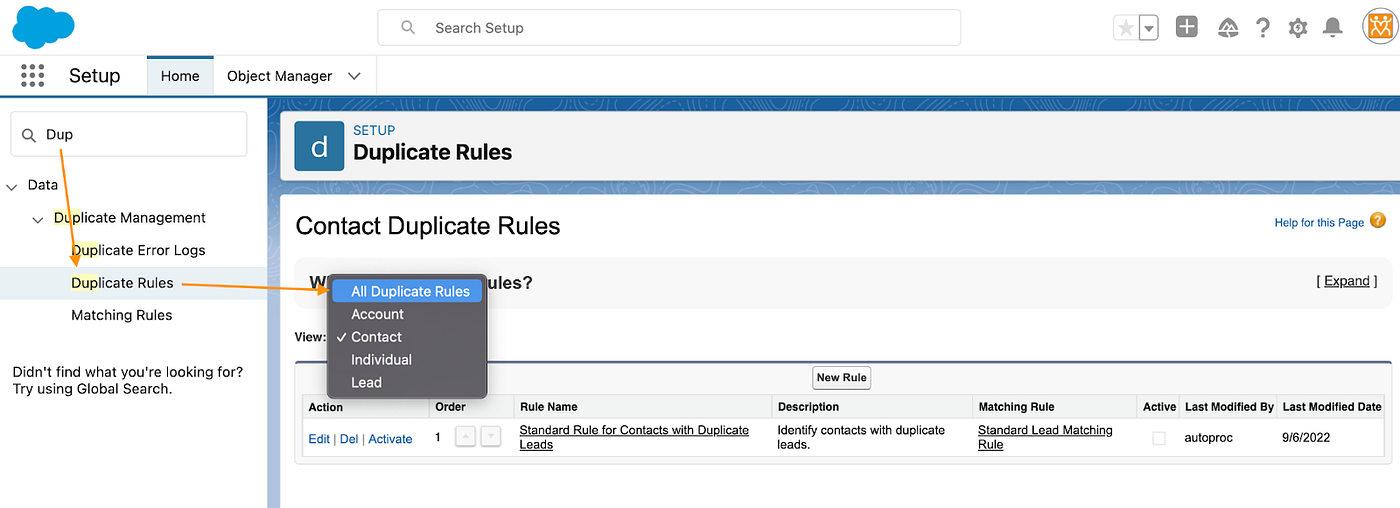
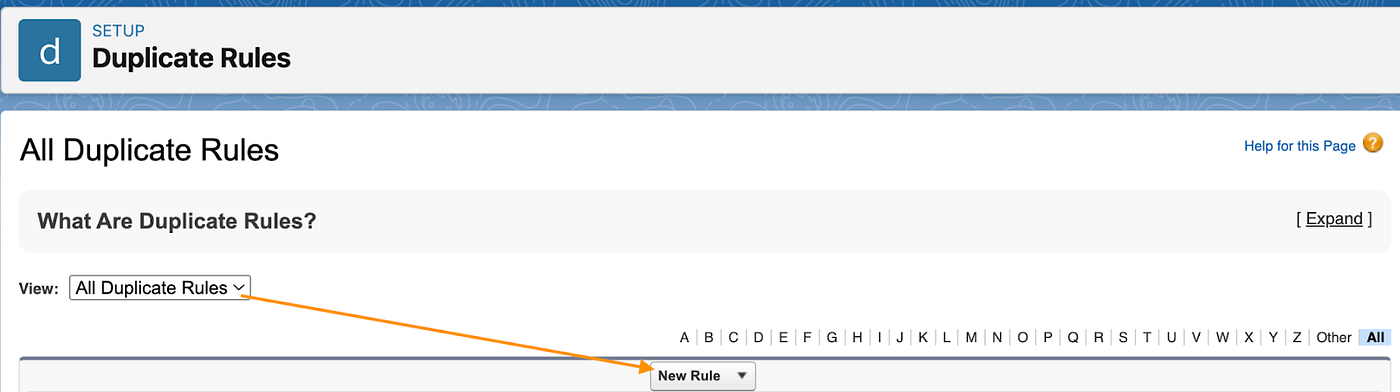
Next up, we need to create and activate a duplication rule. Head over to the “Setup” gear and select “Setup” from the dropdown menu. Click on the “Home” tab and type “Duplicate Rules” within the search bar. Bring up the Duplicate Rules setup window by clicking on the “Duplication Rules” link. From here, select “All Duplicate Rules” from the “View” dropdown list.
Next, click on “New Rule” and select “Account” within the dropdown menu to build out the criteria to identify your duplication rule.
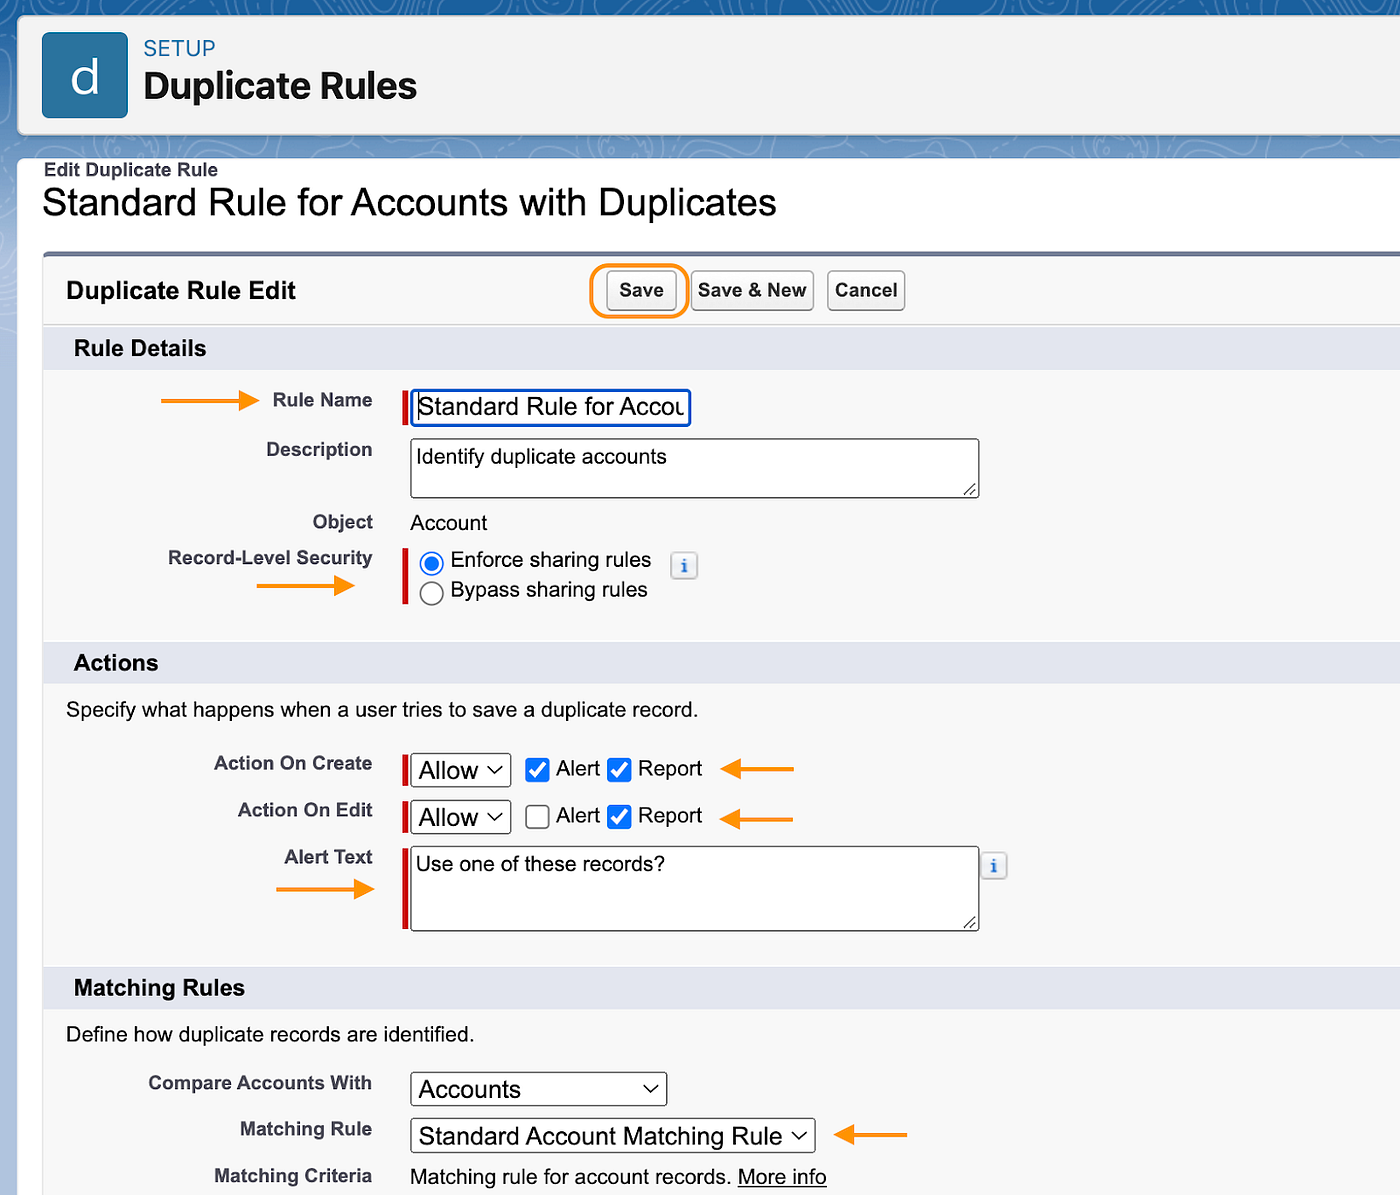
Under Rule Details, you will need to define a “Rule Name”. Keep it simple but use the “Description” box if you need to provide additional information. Leave the “Record-Security Level” as is. Within “Actions”, keep everything as is, but make sure to check the “Report” box within “Action On Edit”. Lastly, but more importantly make sure to select “Standard Account Matching Rule” within Matching Rules. This setting tells Salesforce to do all the leg work and validate records using the predefined matching rules. If you would like to learn more about what’s (under the hood) check out the Salesforce Standard Account Matching Rule article. Once ready, save your rule settings to proceed.
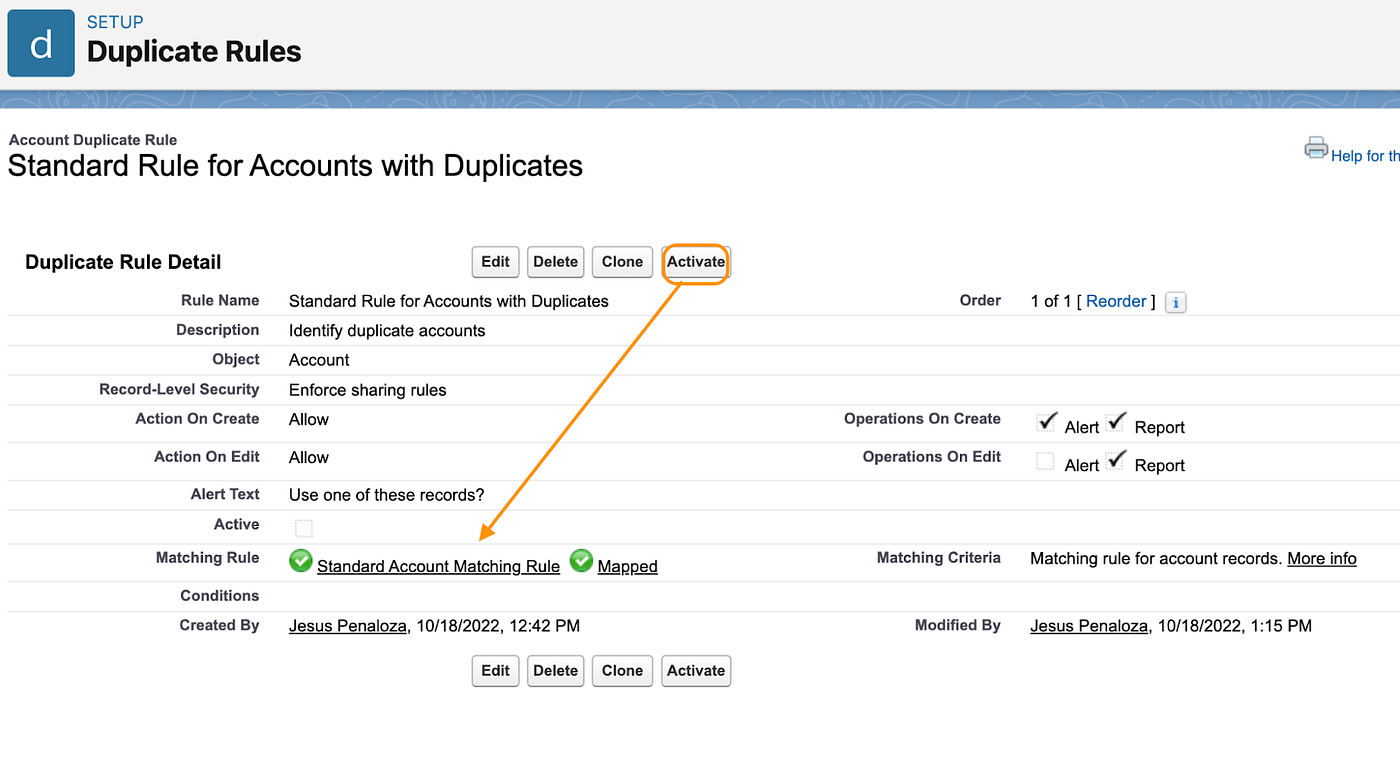
Review the settings of your rule before proceeding to activate it. You will have the option to Edit, Delete or Clone if needed. Before you can activate your rule you need to make sure the “Standard Account Matching Rule” is activated. If not, simply click on the link and hit the “Activate” button. A green check mark will appear next to it once activated. Lastly, once the matching rule is active you can proceed to “Activate” your duplication rule.
This will take you back to the Duplicate Rules setup screen where you will now have your newly created rule along with a checkbox under the Active header. If you don’t see this retrace your steps to ensure your rule is activated.

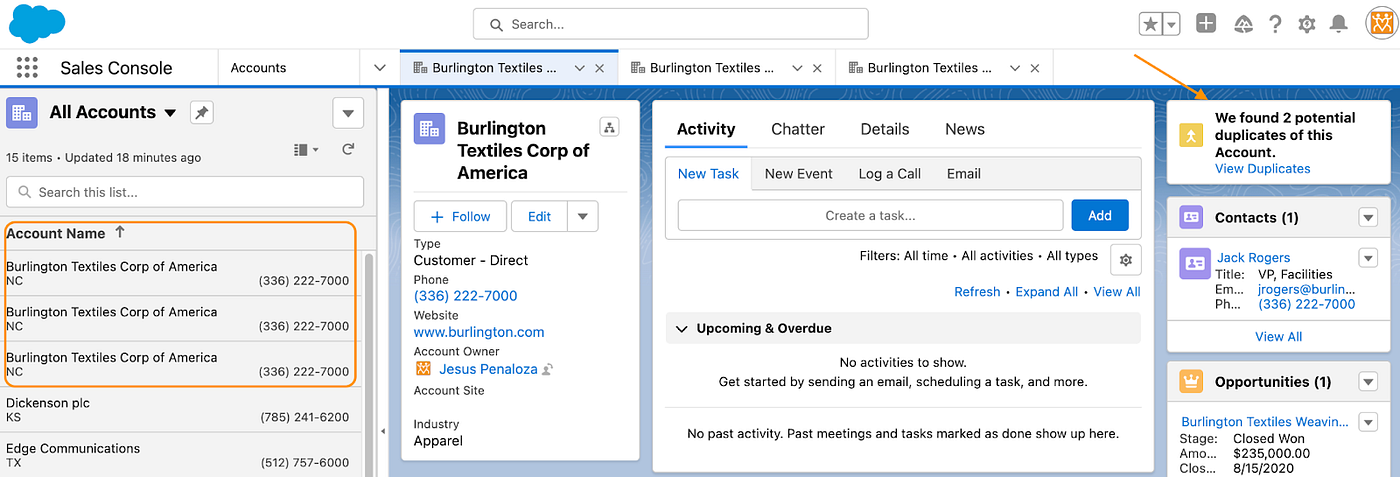
Once the rule is set, now you can traverse your Sales Cloud Accounts records and with the assistance of the “Potential Duplicates” component be able to identify any Account that has duplicate records and needs to be merged. In our example below, you will notice that we have two potential duplicate accounts. Simply click on the component’s “View Duplicates” in order to proceed with the merging wizard.
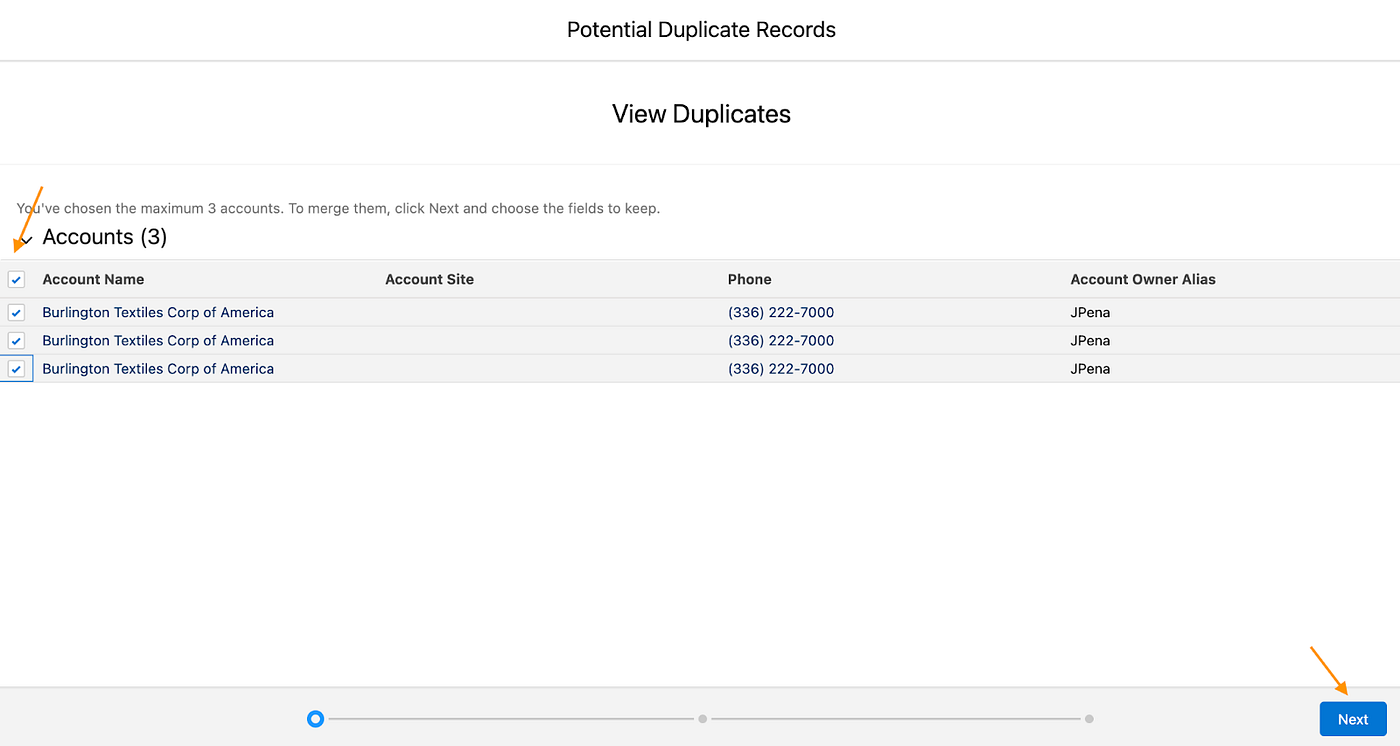
First up, you will be prompted with all accounts which have been identified as Potential Duplicate Records. Simply select all that apply and proceed by pressing on “Next”.
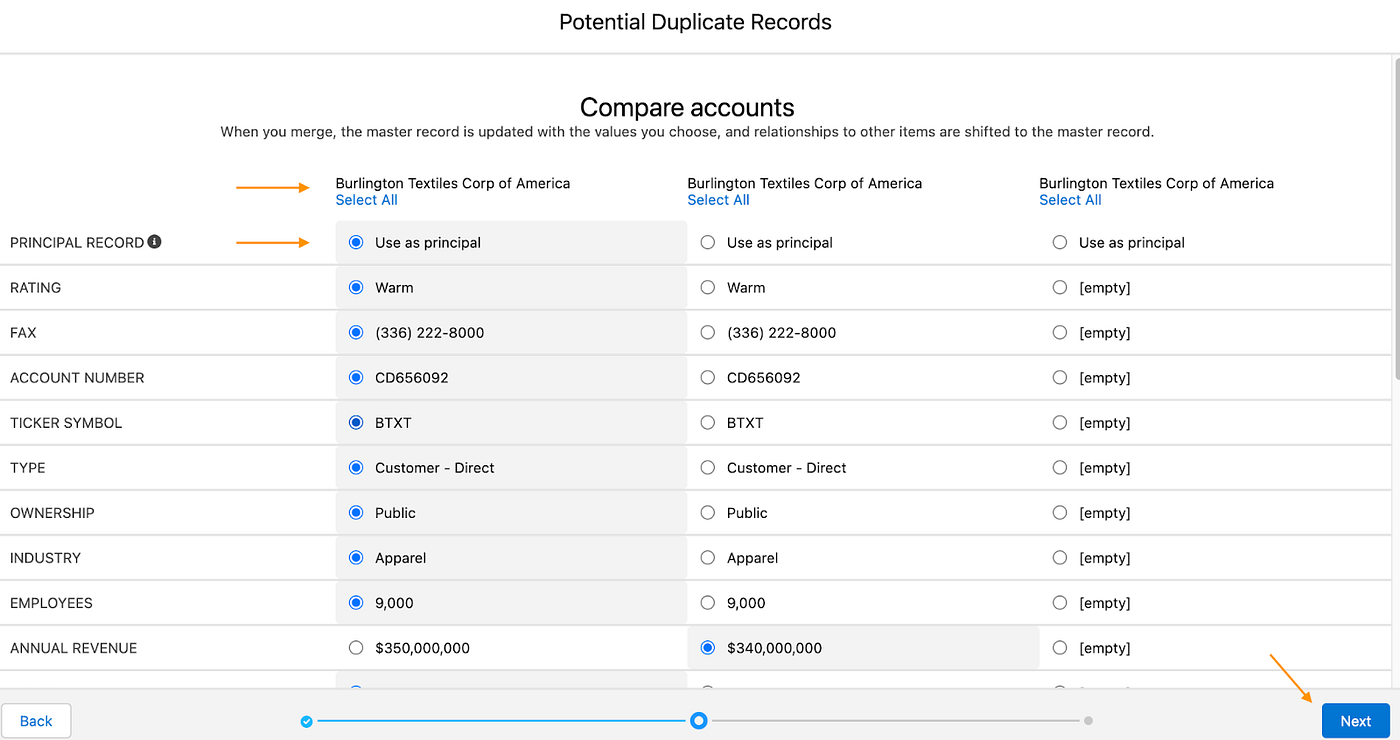
Go ahead and traverse each Account record fields to identify which data will be merged. Once all fields have been reviewed proceed by pressing “Next”.
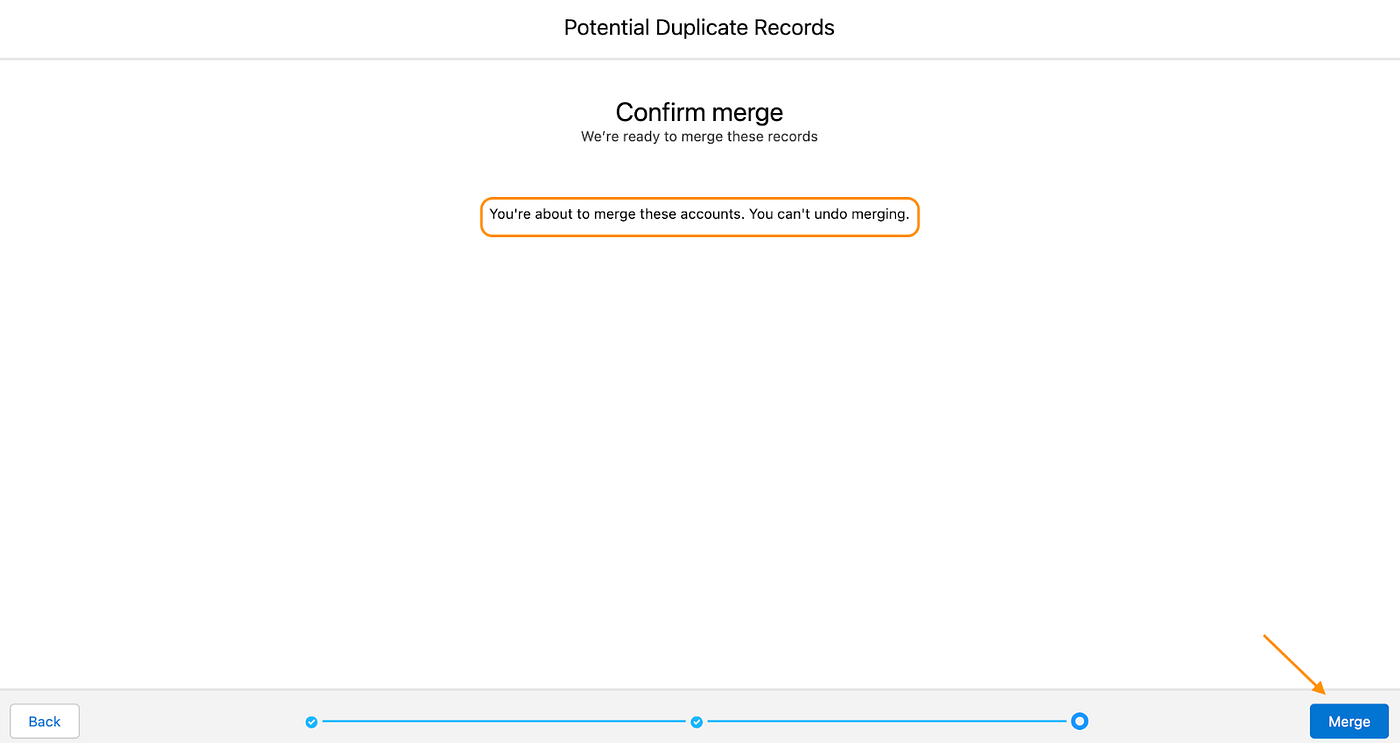
Once the merge is applied there is no way to undo this. Now is the time to go back if needed to double-check everything. Once you are ready proceed by confirming the “Merge”. (A dialogue box may appear confirming the merge was successful)
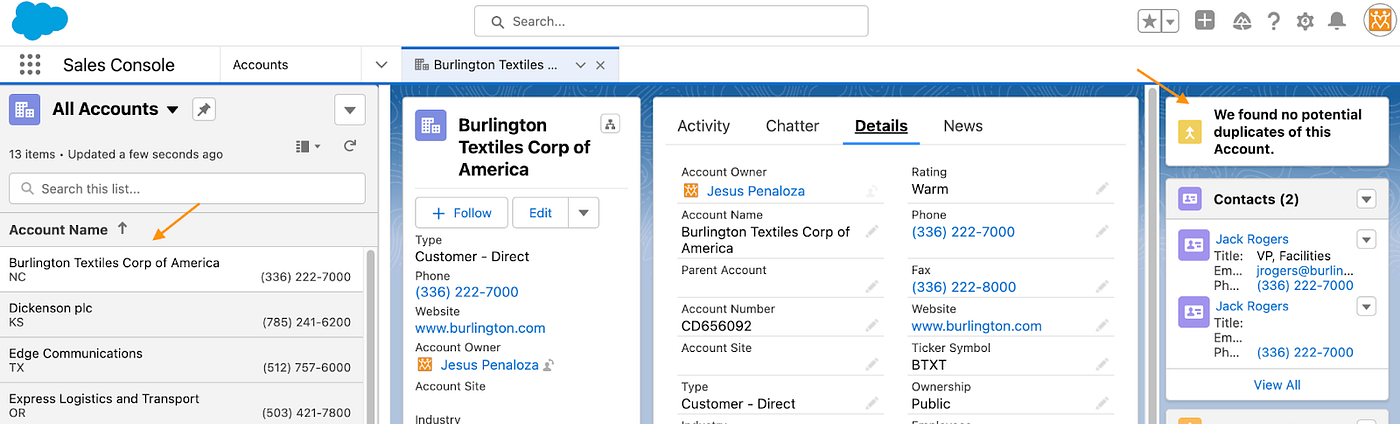
Heading back to Accounts you will now notice the Potential Duplicates component no longer flags duplicates on this Account record.
**Classic Mode Instructions **Still running on a non-Lightning environment, well don’t worry we gotcha covered. Here are the instructions on how to merge Accounts within Classic.
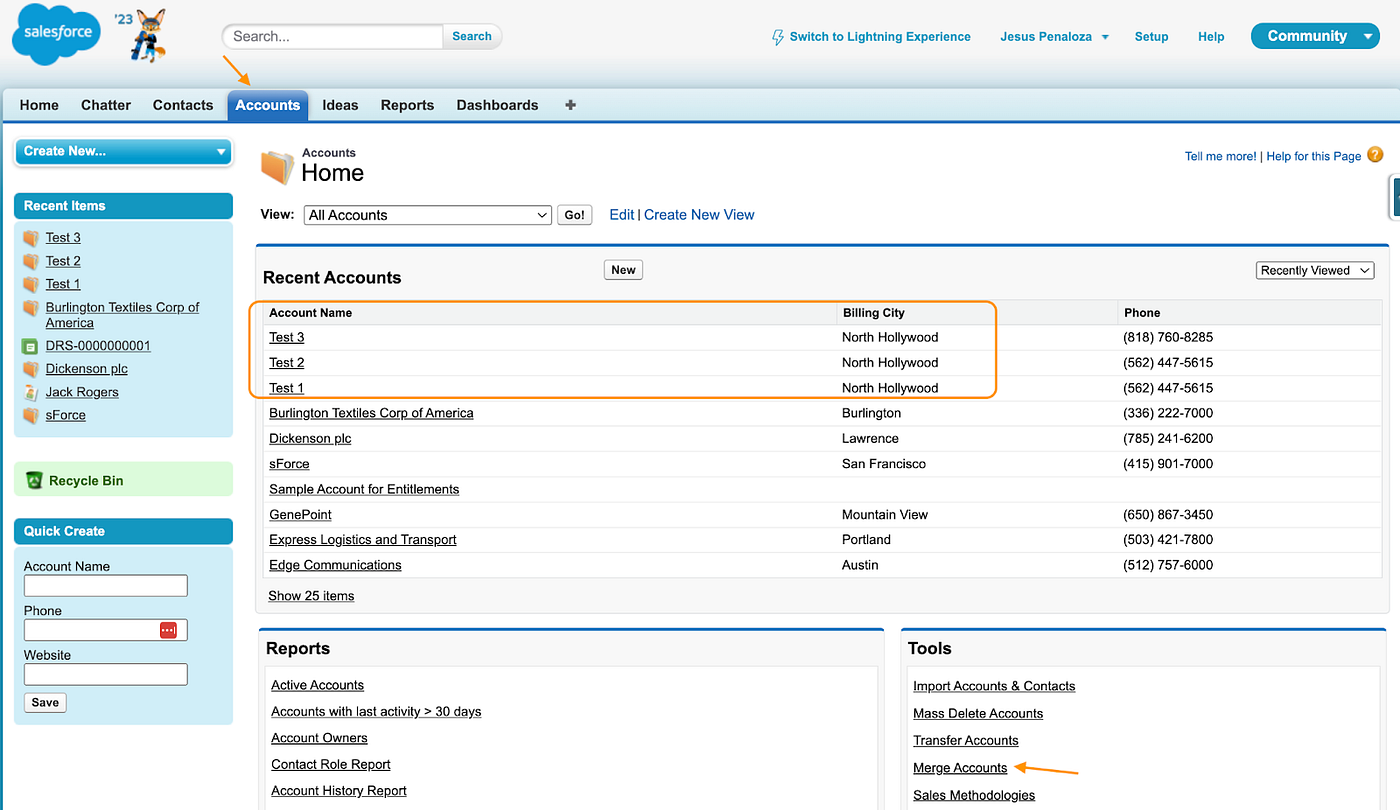
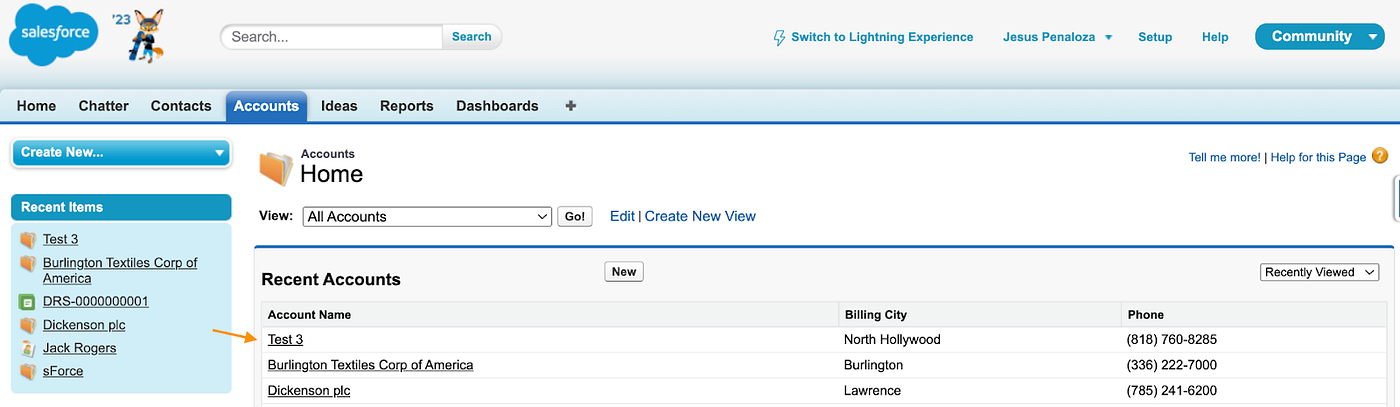
First, you will need to fire up a Classic instance and head over to the Accounts tab. From the default layout, you will be able to access the most recent Accounts. For our example, we created three test accounts with slightly different field data values to merge into one single account. Under “Tools” you will see a “Merge Accounts” link. Go ahead and press it to begin.
If for some reason you do not have the “Merge Accounts” link, kindly ask one of your Admins to help you activate this tool within your org.
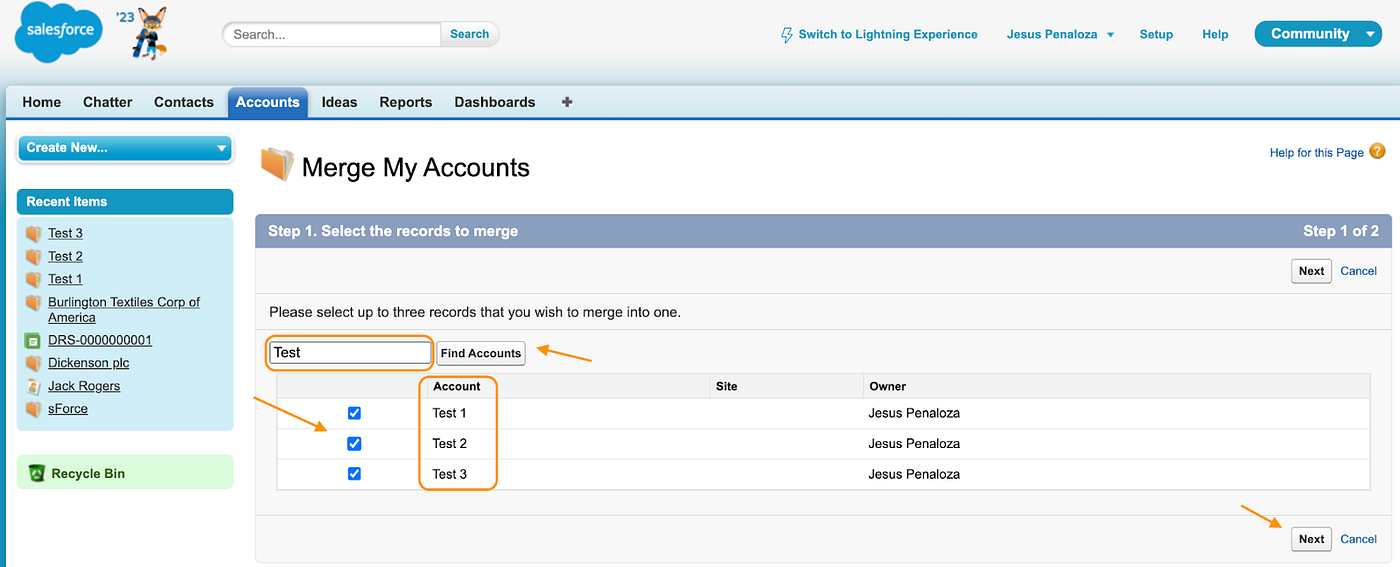
Next up, go ahead and search for the Accounts you wish to merge. Once again, for our example will type in “Test” and initiate the search. Once the results come back you will notice that all accounts matching your search will populate and have a checkmark next to them. For our example we want to merge all test Accounts, so will make sure all check marks are applied and proceed by pressing “Next”.
Now it’s time to identify what data within each field is going to carry over to the merged account. You have the option to merge a master account with all fields included or individually highlight which fields will correspond to the merged account. Once all the selections have been made go ahead and press the “Merge” button.
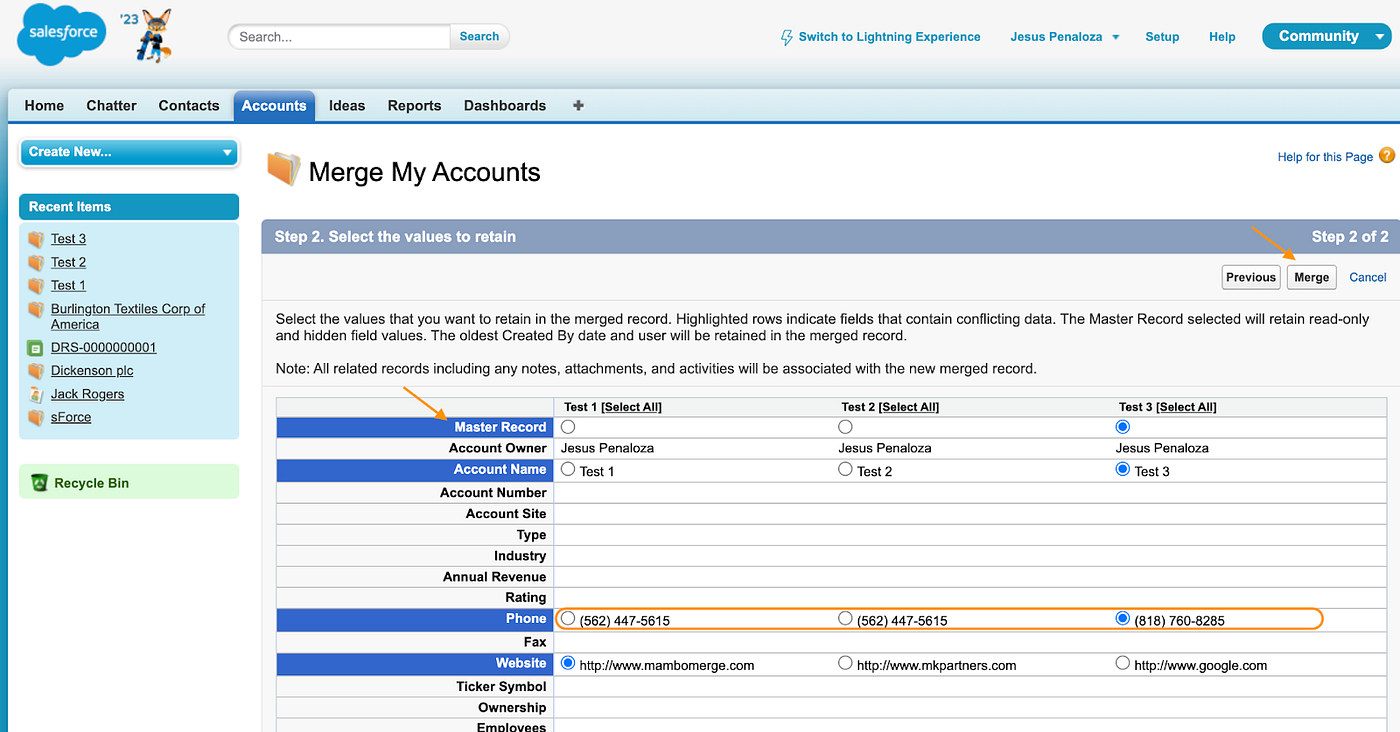
Make sure to double or triple-check the changes requested as there is no undo or unmerge button once you proceed. This means that data not merged along with the other accounts will be permanently removed.
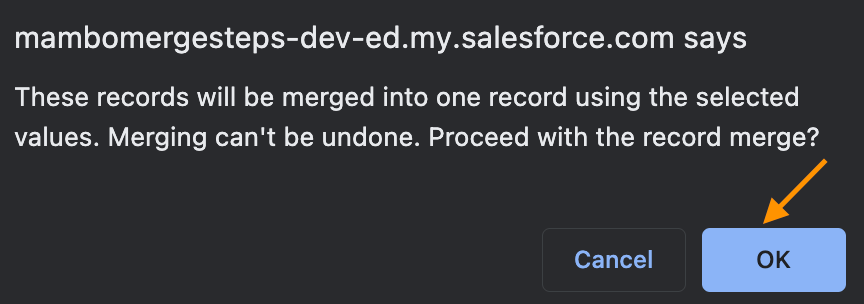
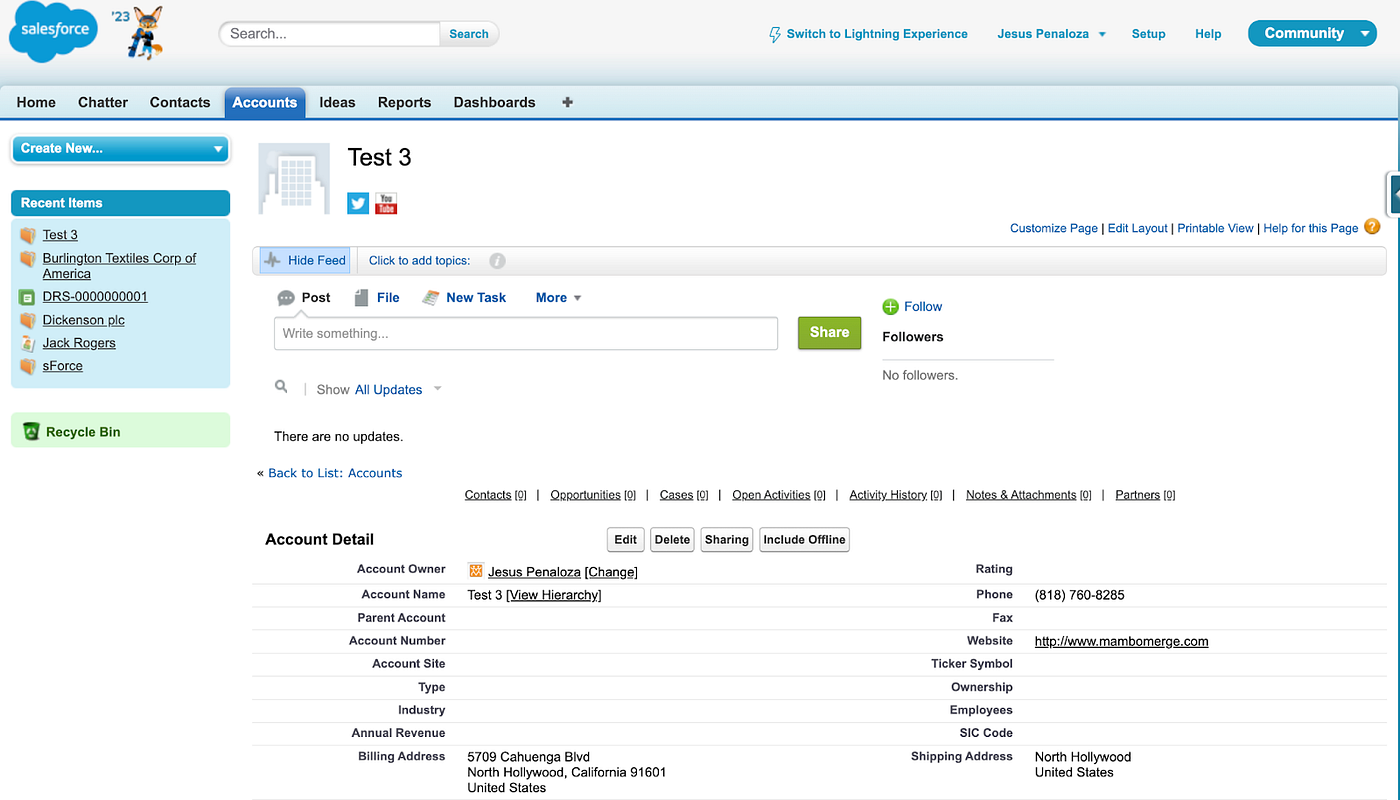
Once confirmed, you will be taken back to the Accounts Home layout with the reflected changes applied. In our example, we removed the first two test Accounts and kept the third one with some migrated fields from the first two.
You can always go into the merged account to verify the changes applied during the merge.
If you still need a hand getting started or just getting more out of your org in general, drop us a line! We’re always happy to help.
Until next time, keep working hard, smart, and happy. And we’ll see you in the cloud.